Problems and Repairs
These are just a few of the recent difficulties that I encountered while working on this project.
August 8, 2022
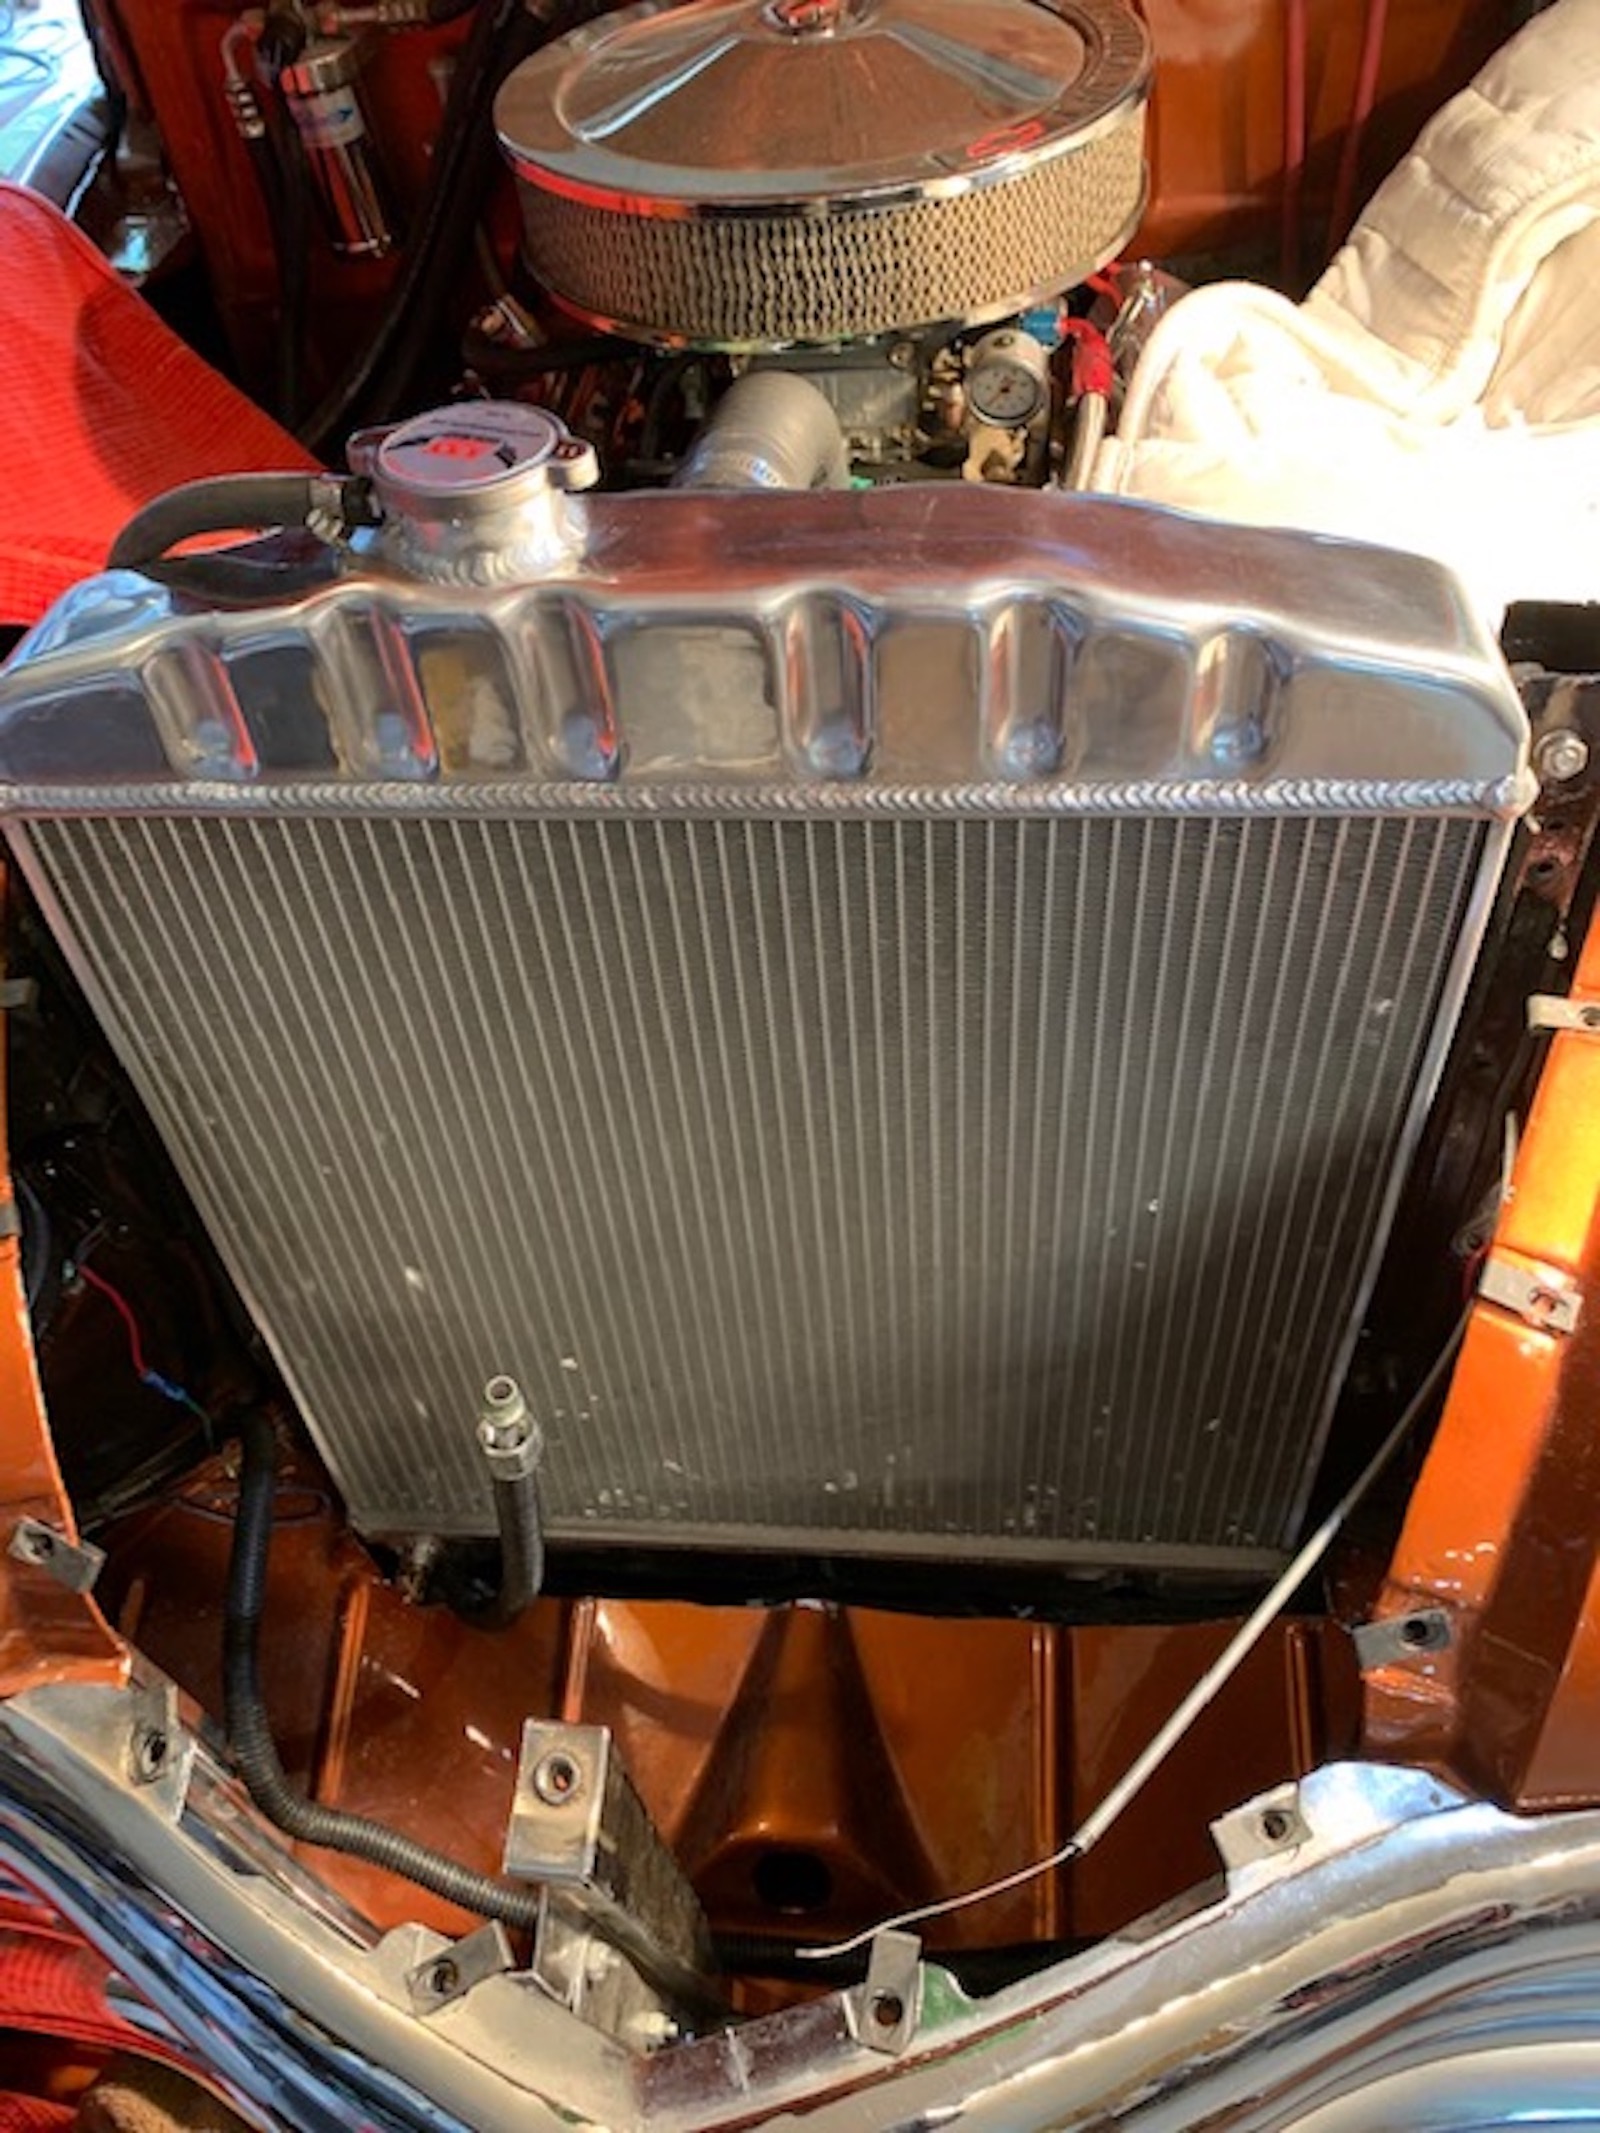
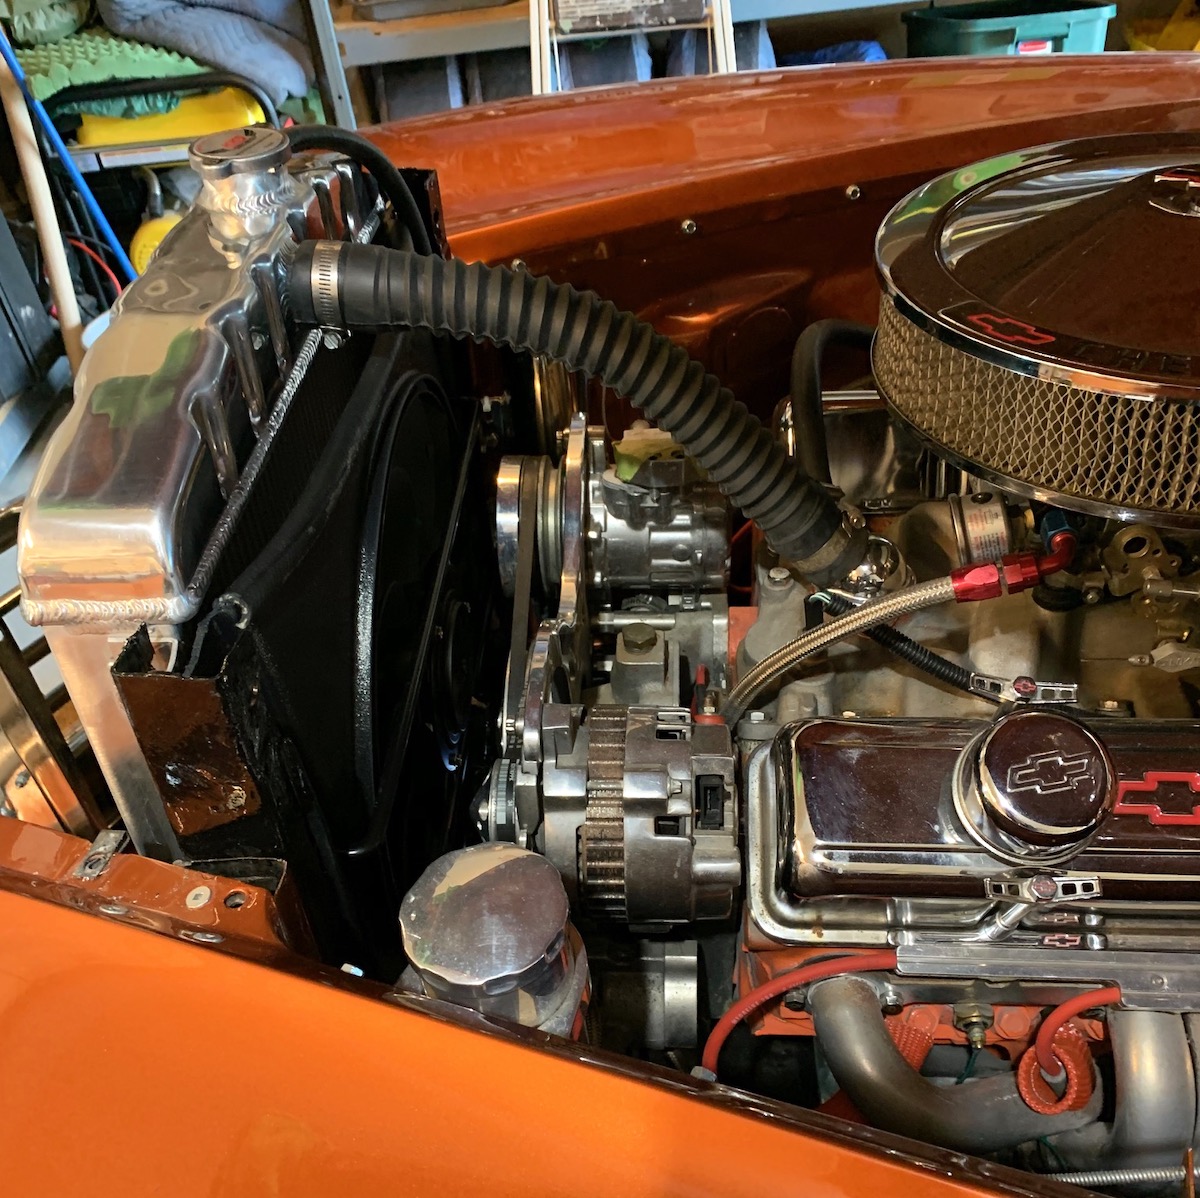
My heating problems persisted. I finally decided to swap the motor with the gm350 that I won at Rodarama 2022 (see recent pictures).
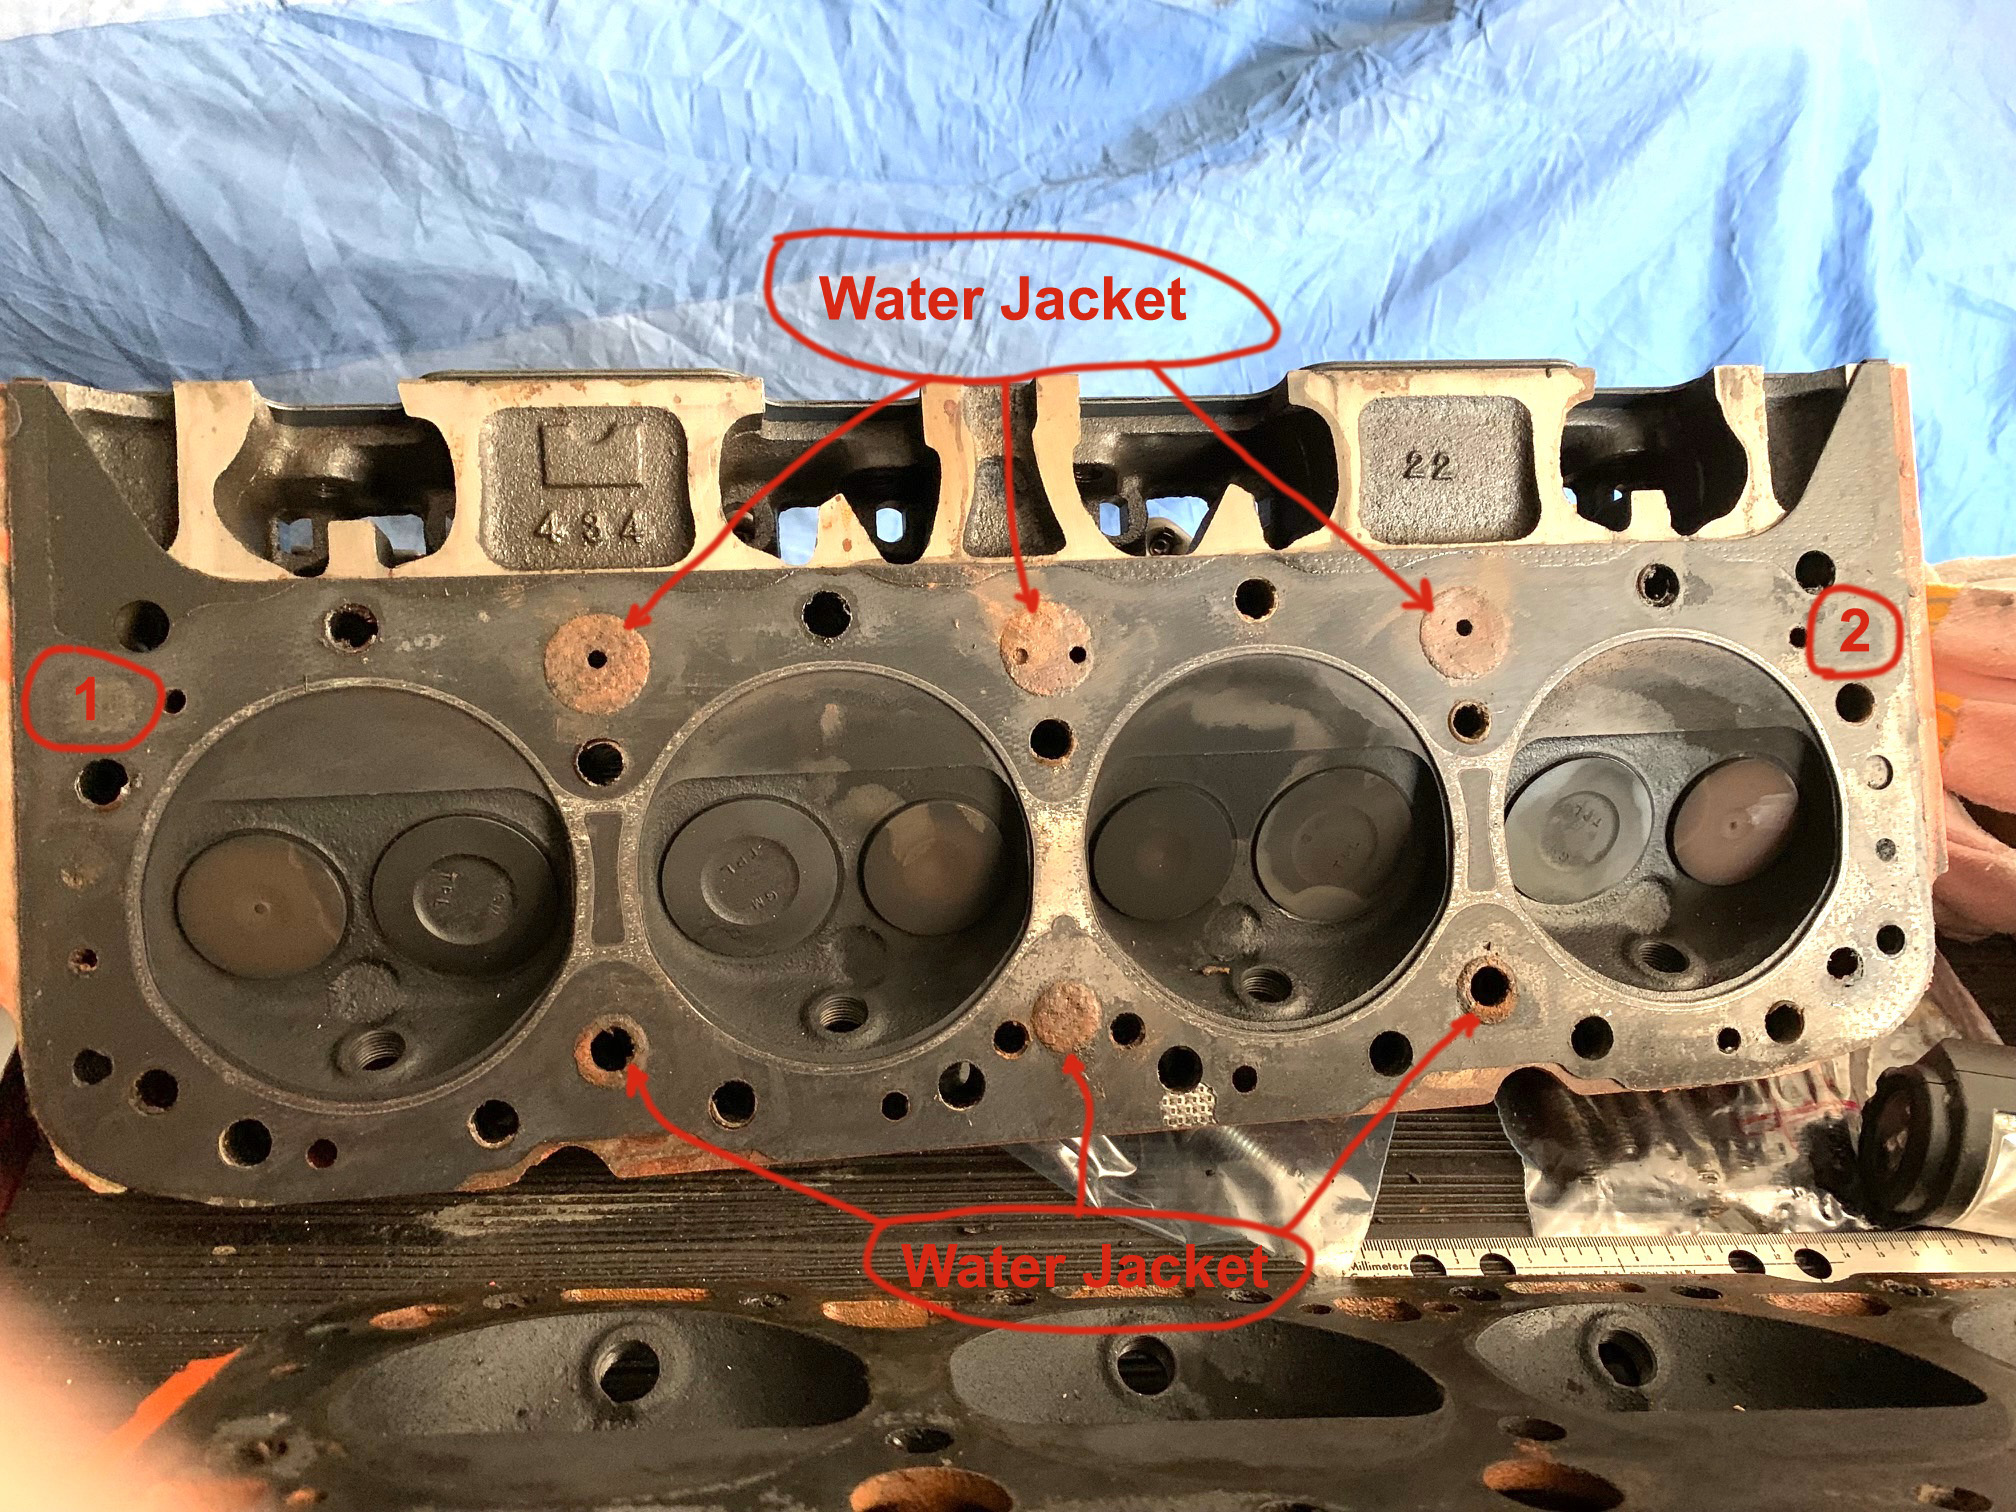
We removed the heads from the gm305 and inspected them. We discovered that the wrong head gaskets were used when the engine was rebuilt and some of the water jacket openings were blocked or severely restricted!
This first picture shows the first head with no head gasket on it
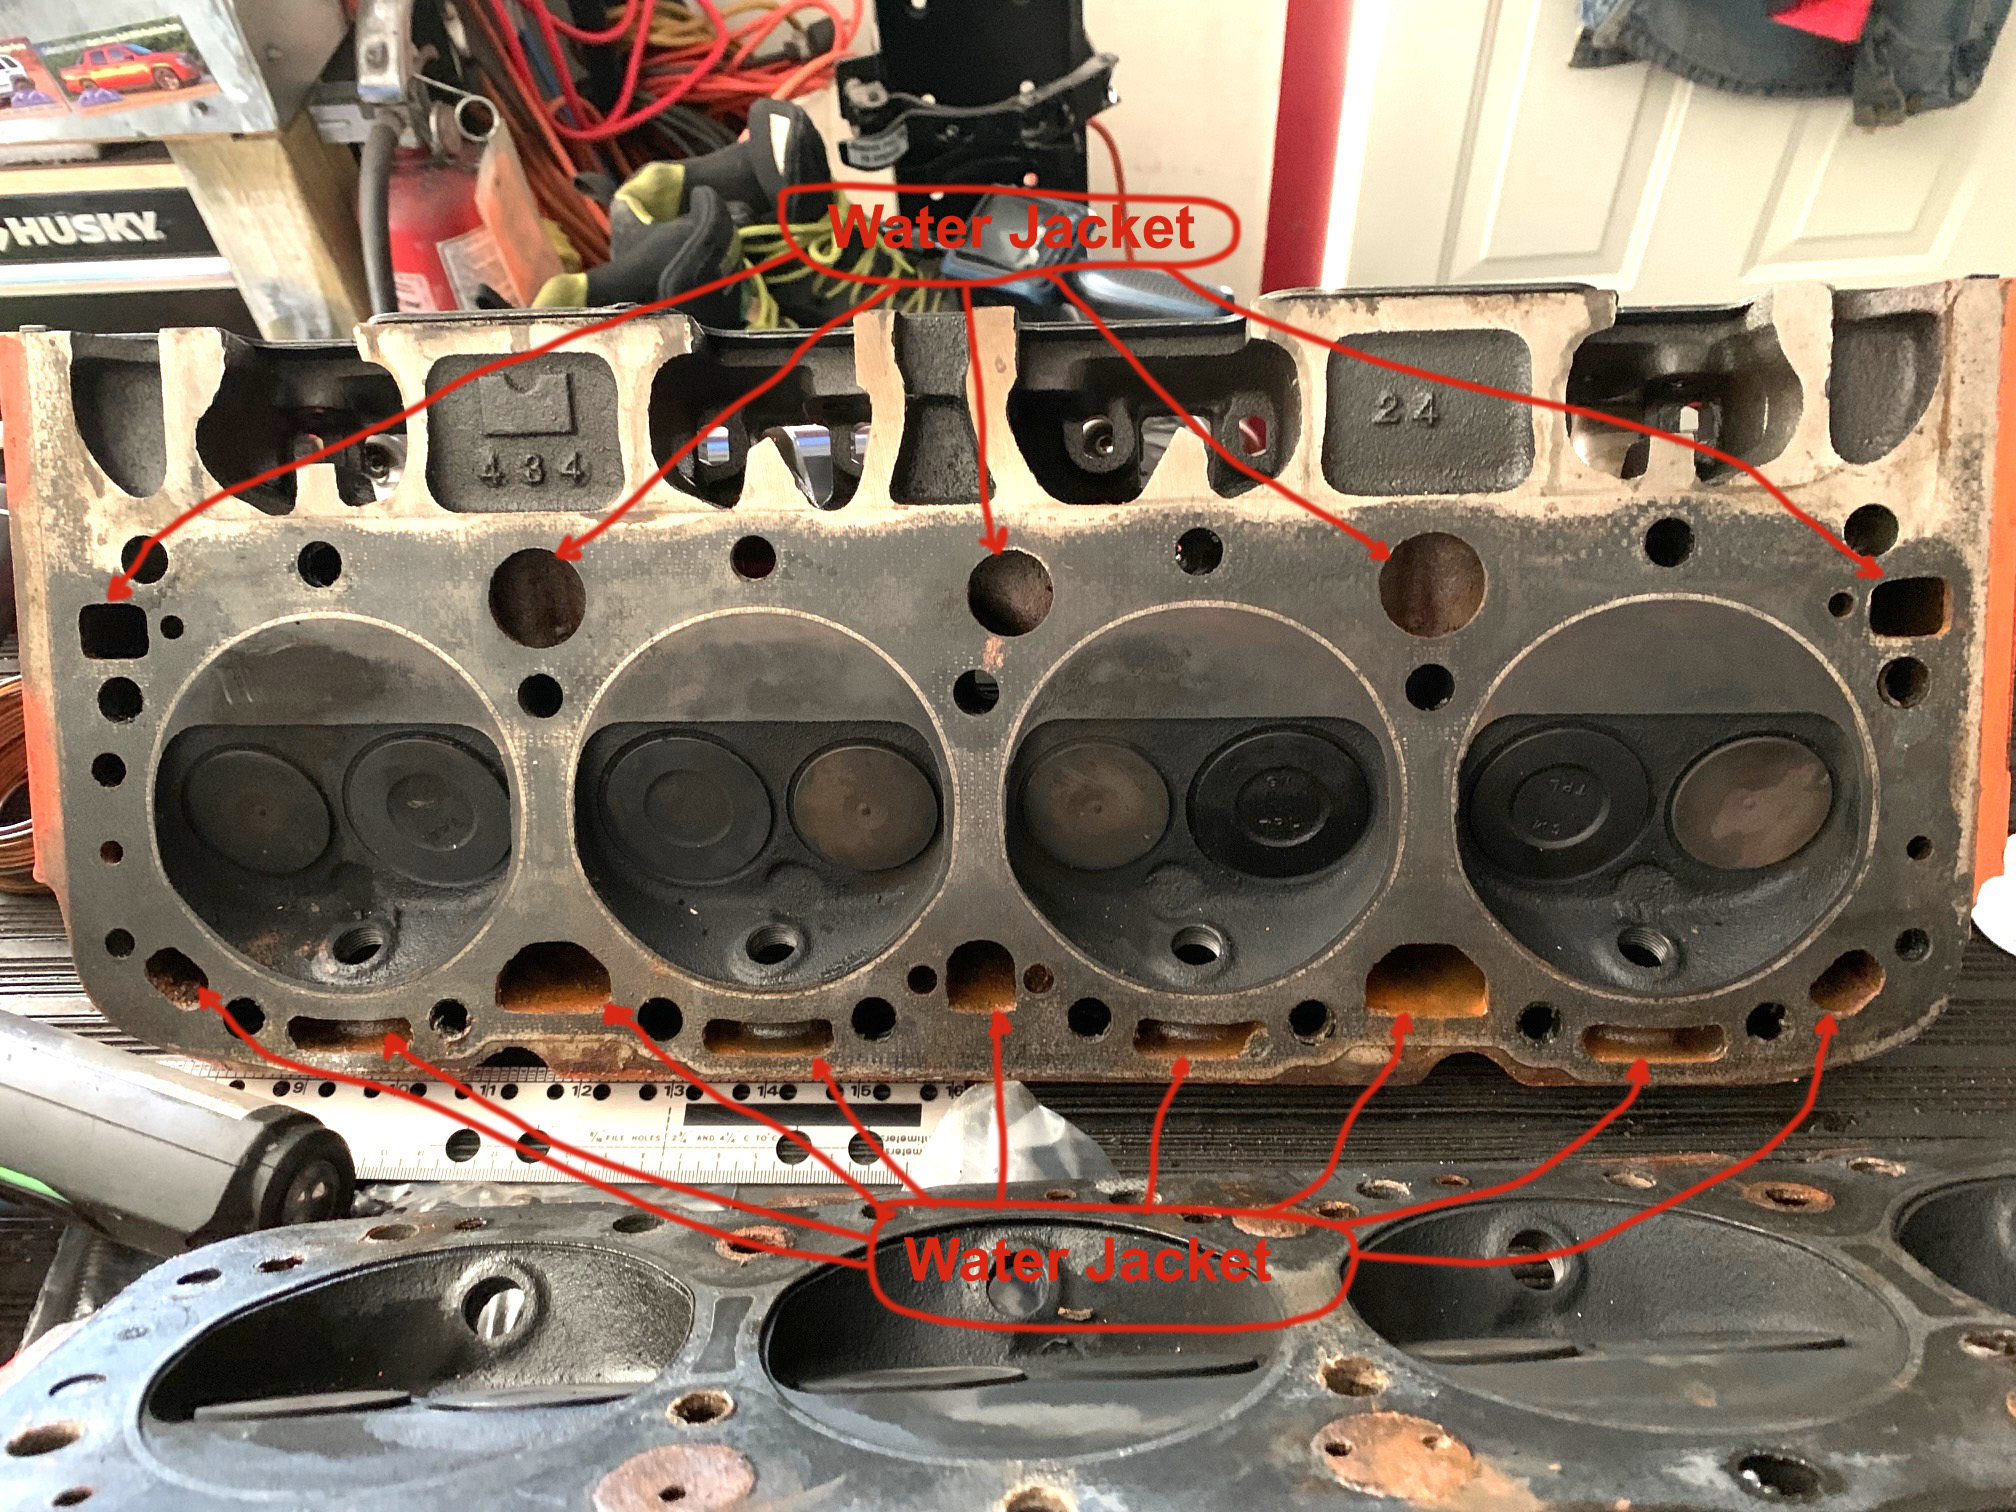
This seconde picture shows the second head with the head gasket still on it. Several of the water jacket openings are severely restricted!
The circles with the number 1 and 2 are two locations on the block that had no holes for the water jacket. Maybe these are the wrong heads for this block!
June 12, 2022
I took my car to my mechanic because of the following problems:
• huge overheating
• lifter noise
• vacuum advance at maximum
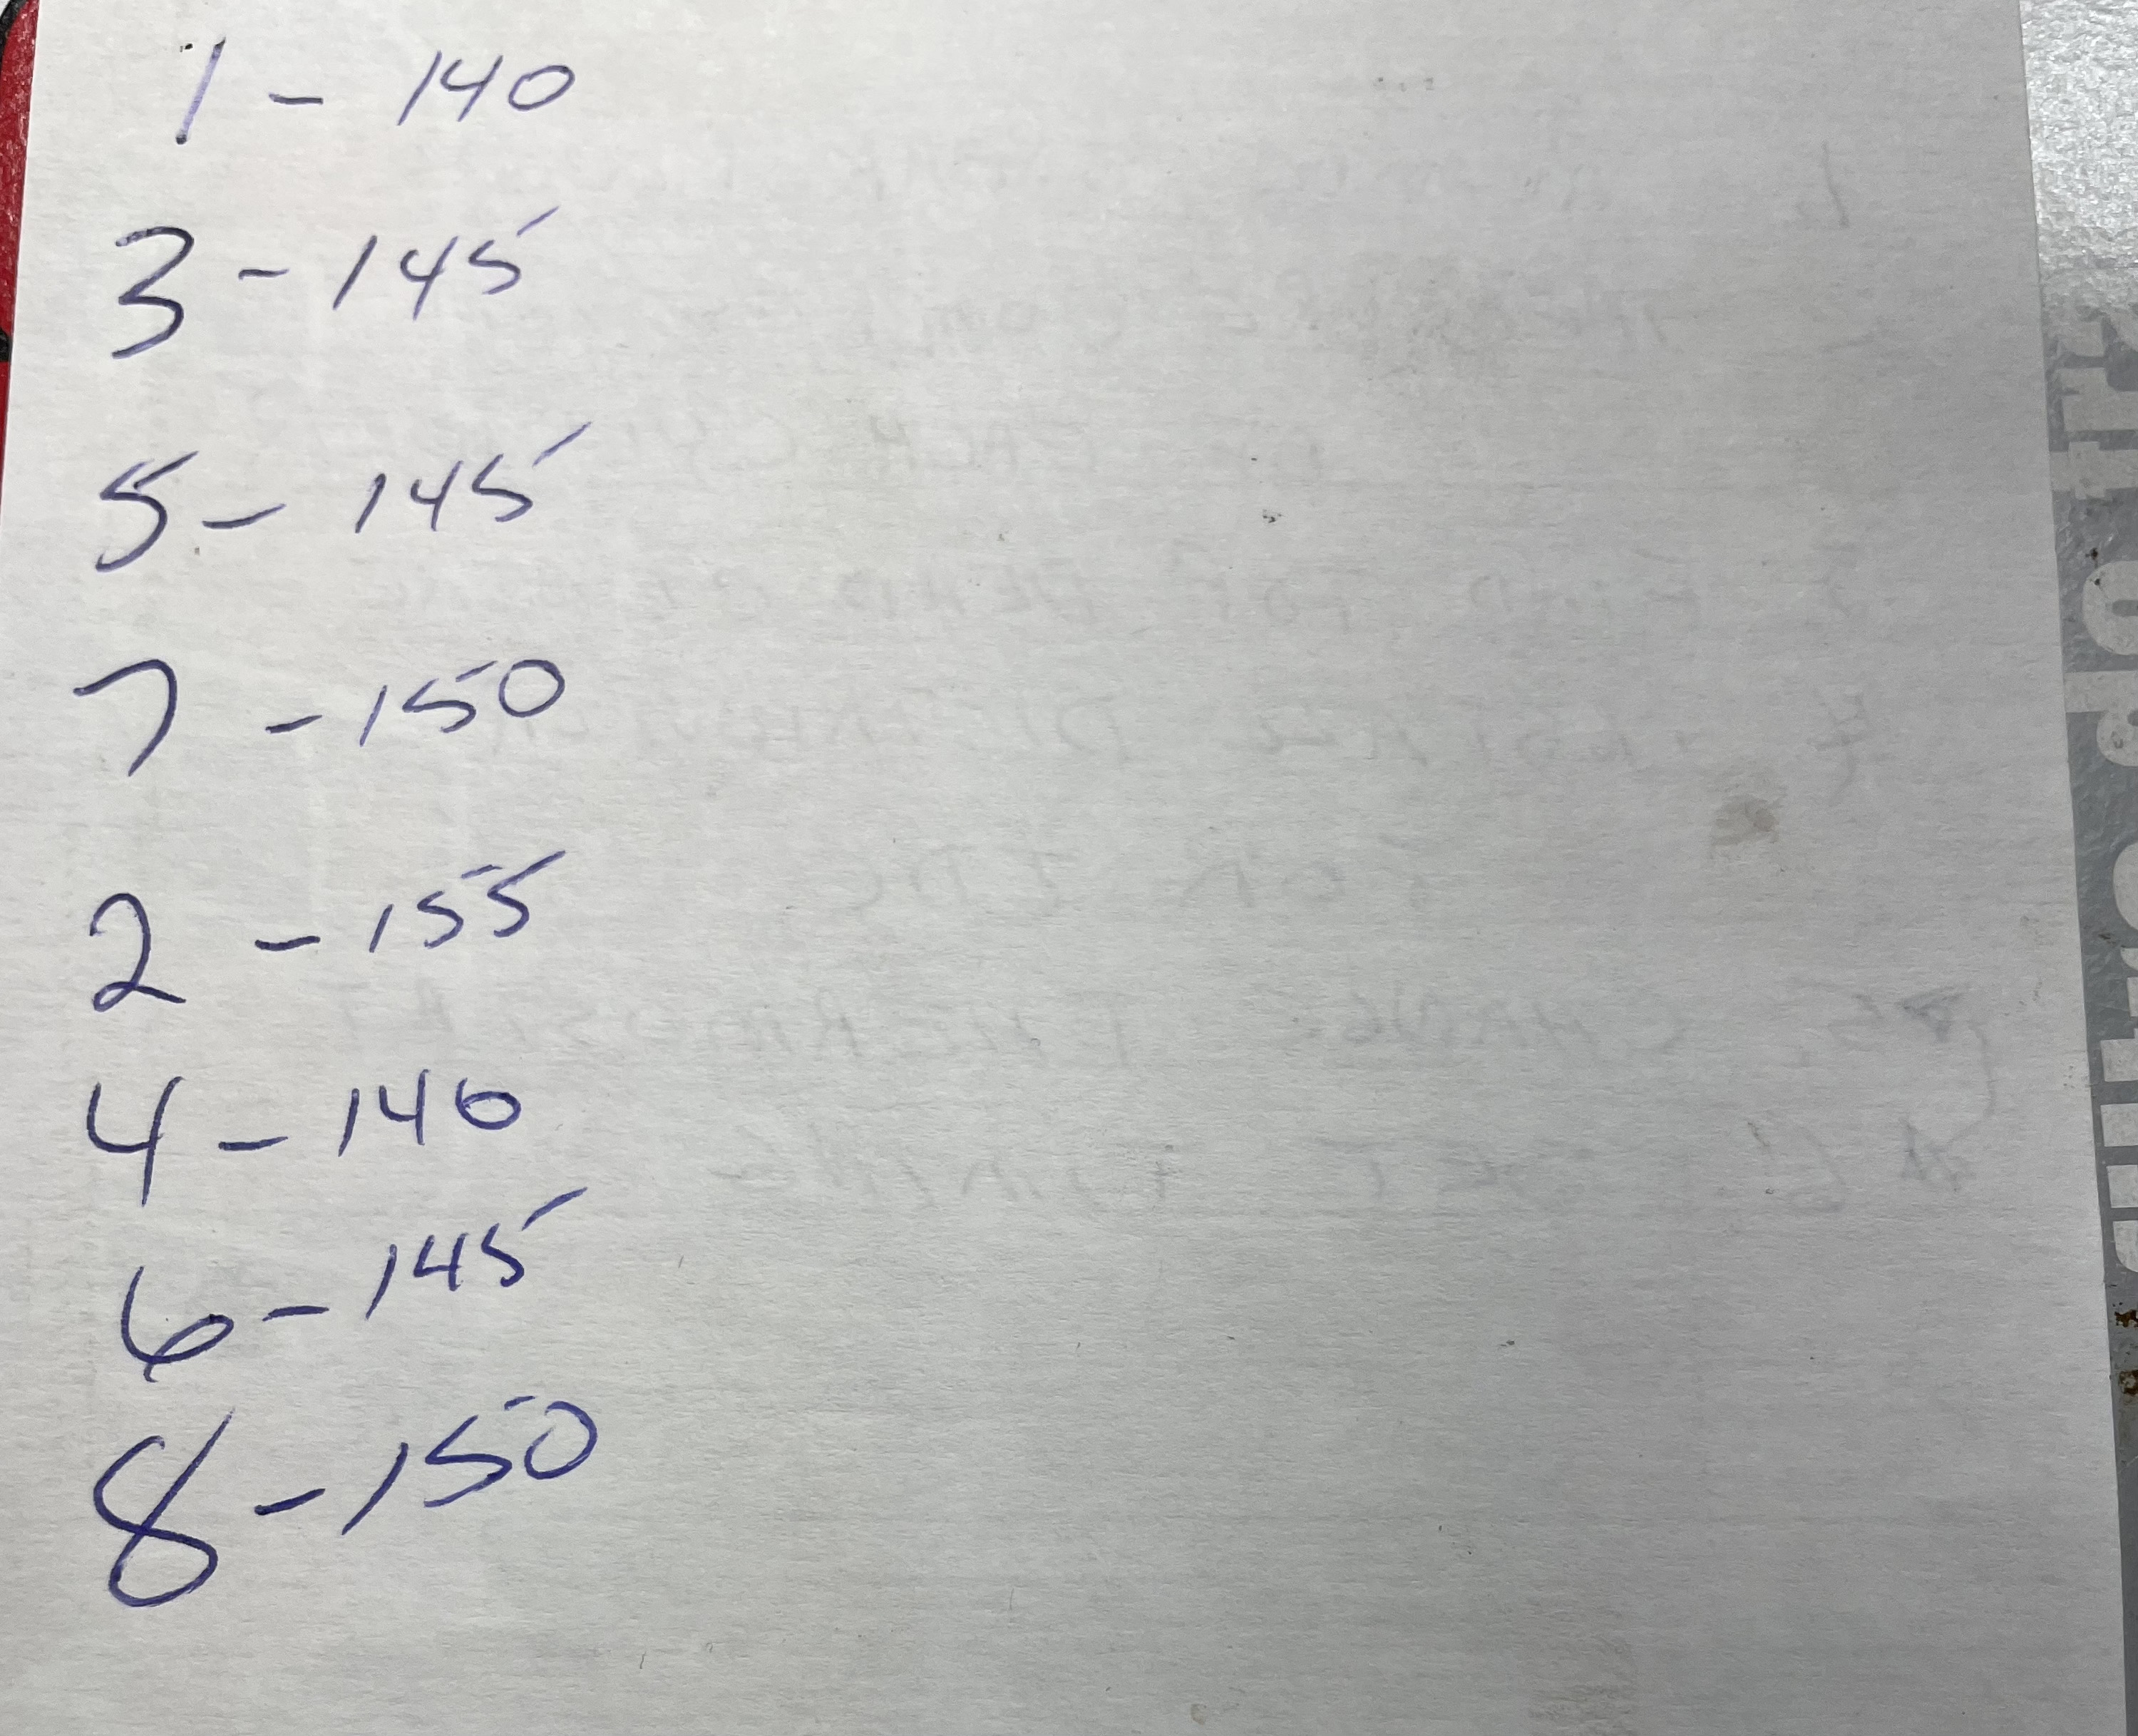
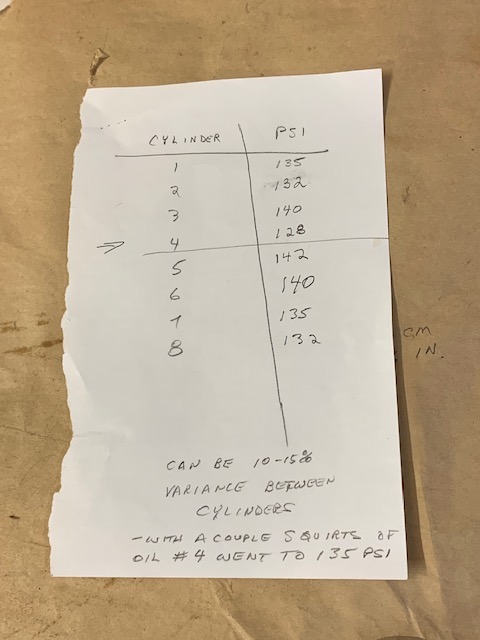
I also wanted him to measure the compression of each cylinder and set the timing.
This is what he found:
• the thermostat was stuck open
• all the header bolts were loose (I had tightened them last year!)
• the distributor was 1 notch out
The compression numbers that he recorded are below.
Once the header bolts were tightened, I no longer heard lifter noise!
The car runs much better now!
I got my motor from a friend of a friend who said it was rebuilt. The question I had to determine is whether the motor came with a serpentine water pump or v-belt water pump. I quessed it was a v-belt because of the pully that was already on it. The waterpump for a serpentine setup runs opposite direction than the one from a v-belt system.
May 5, 2021
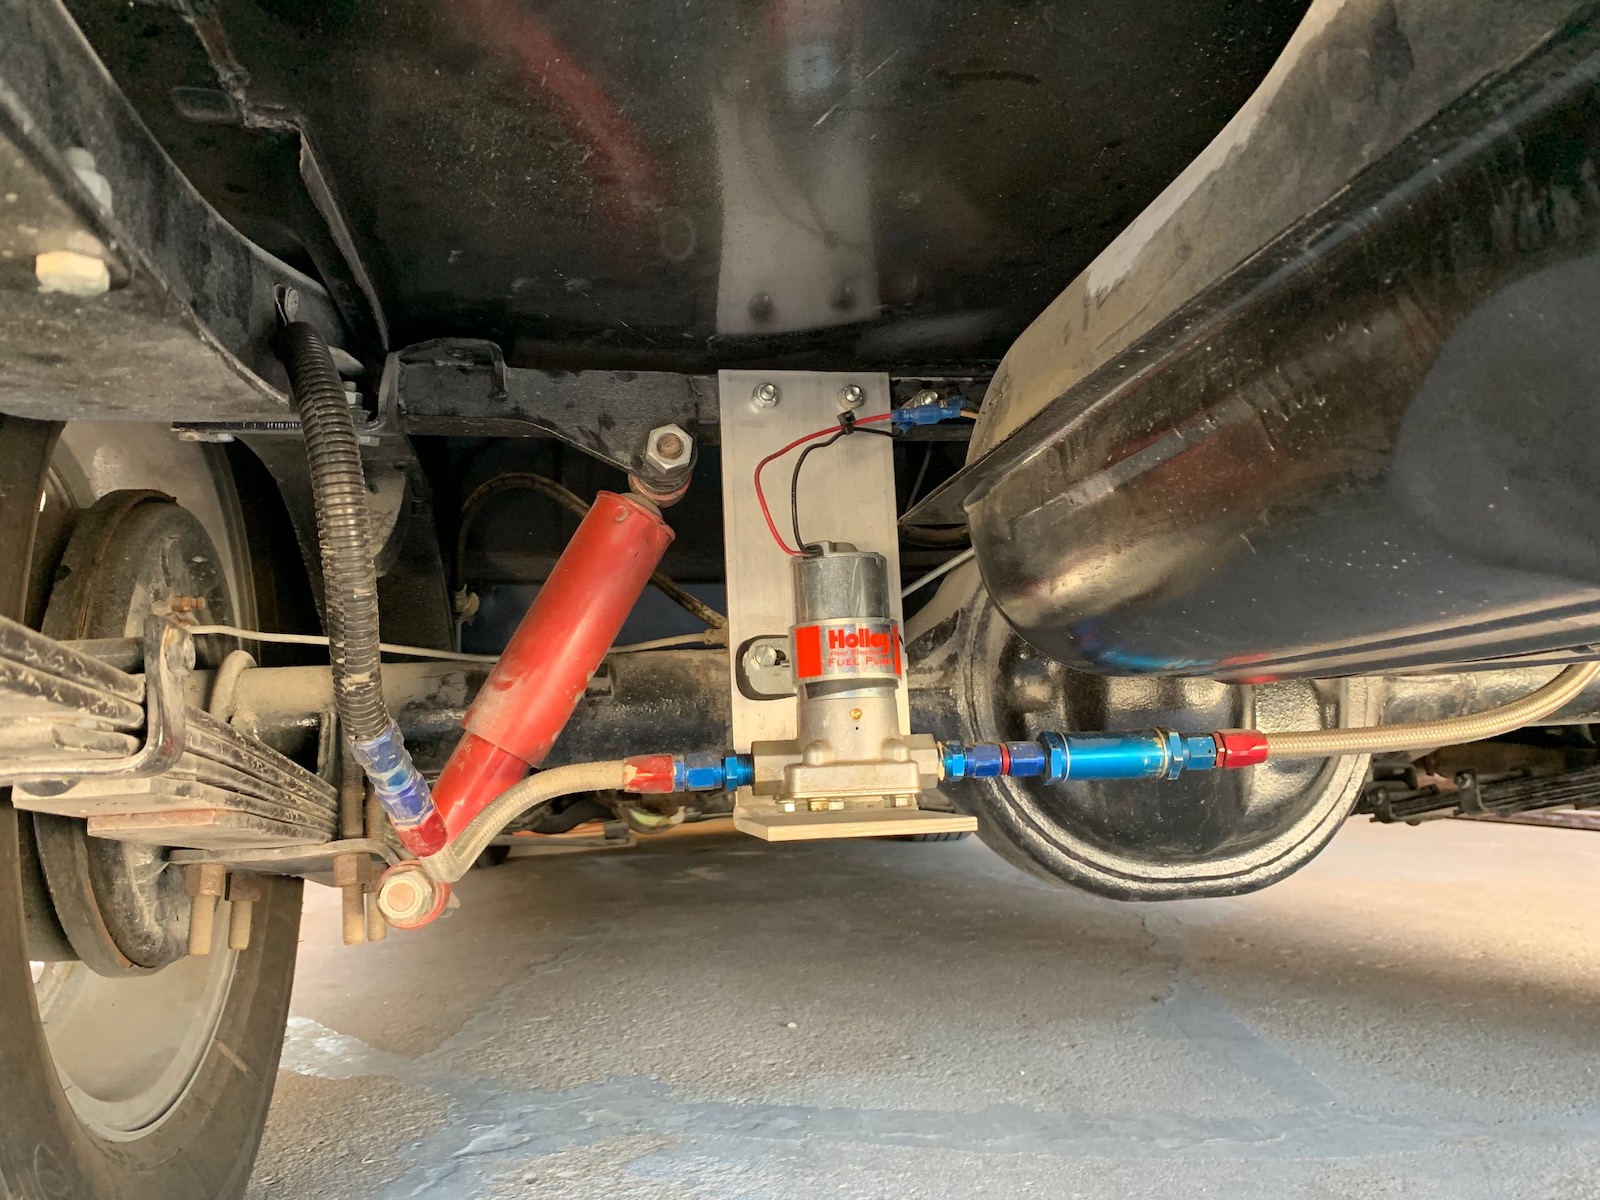
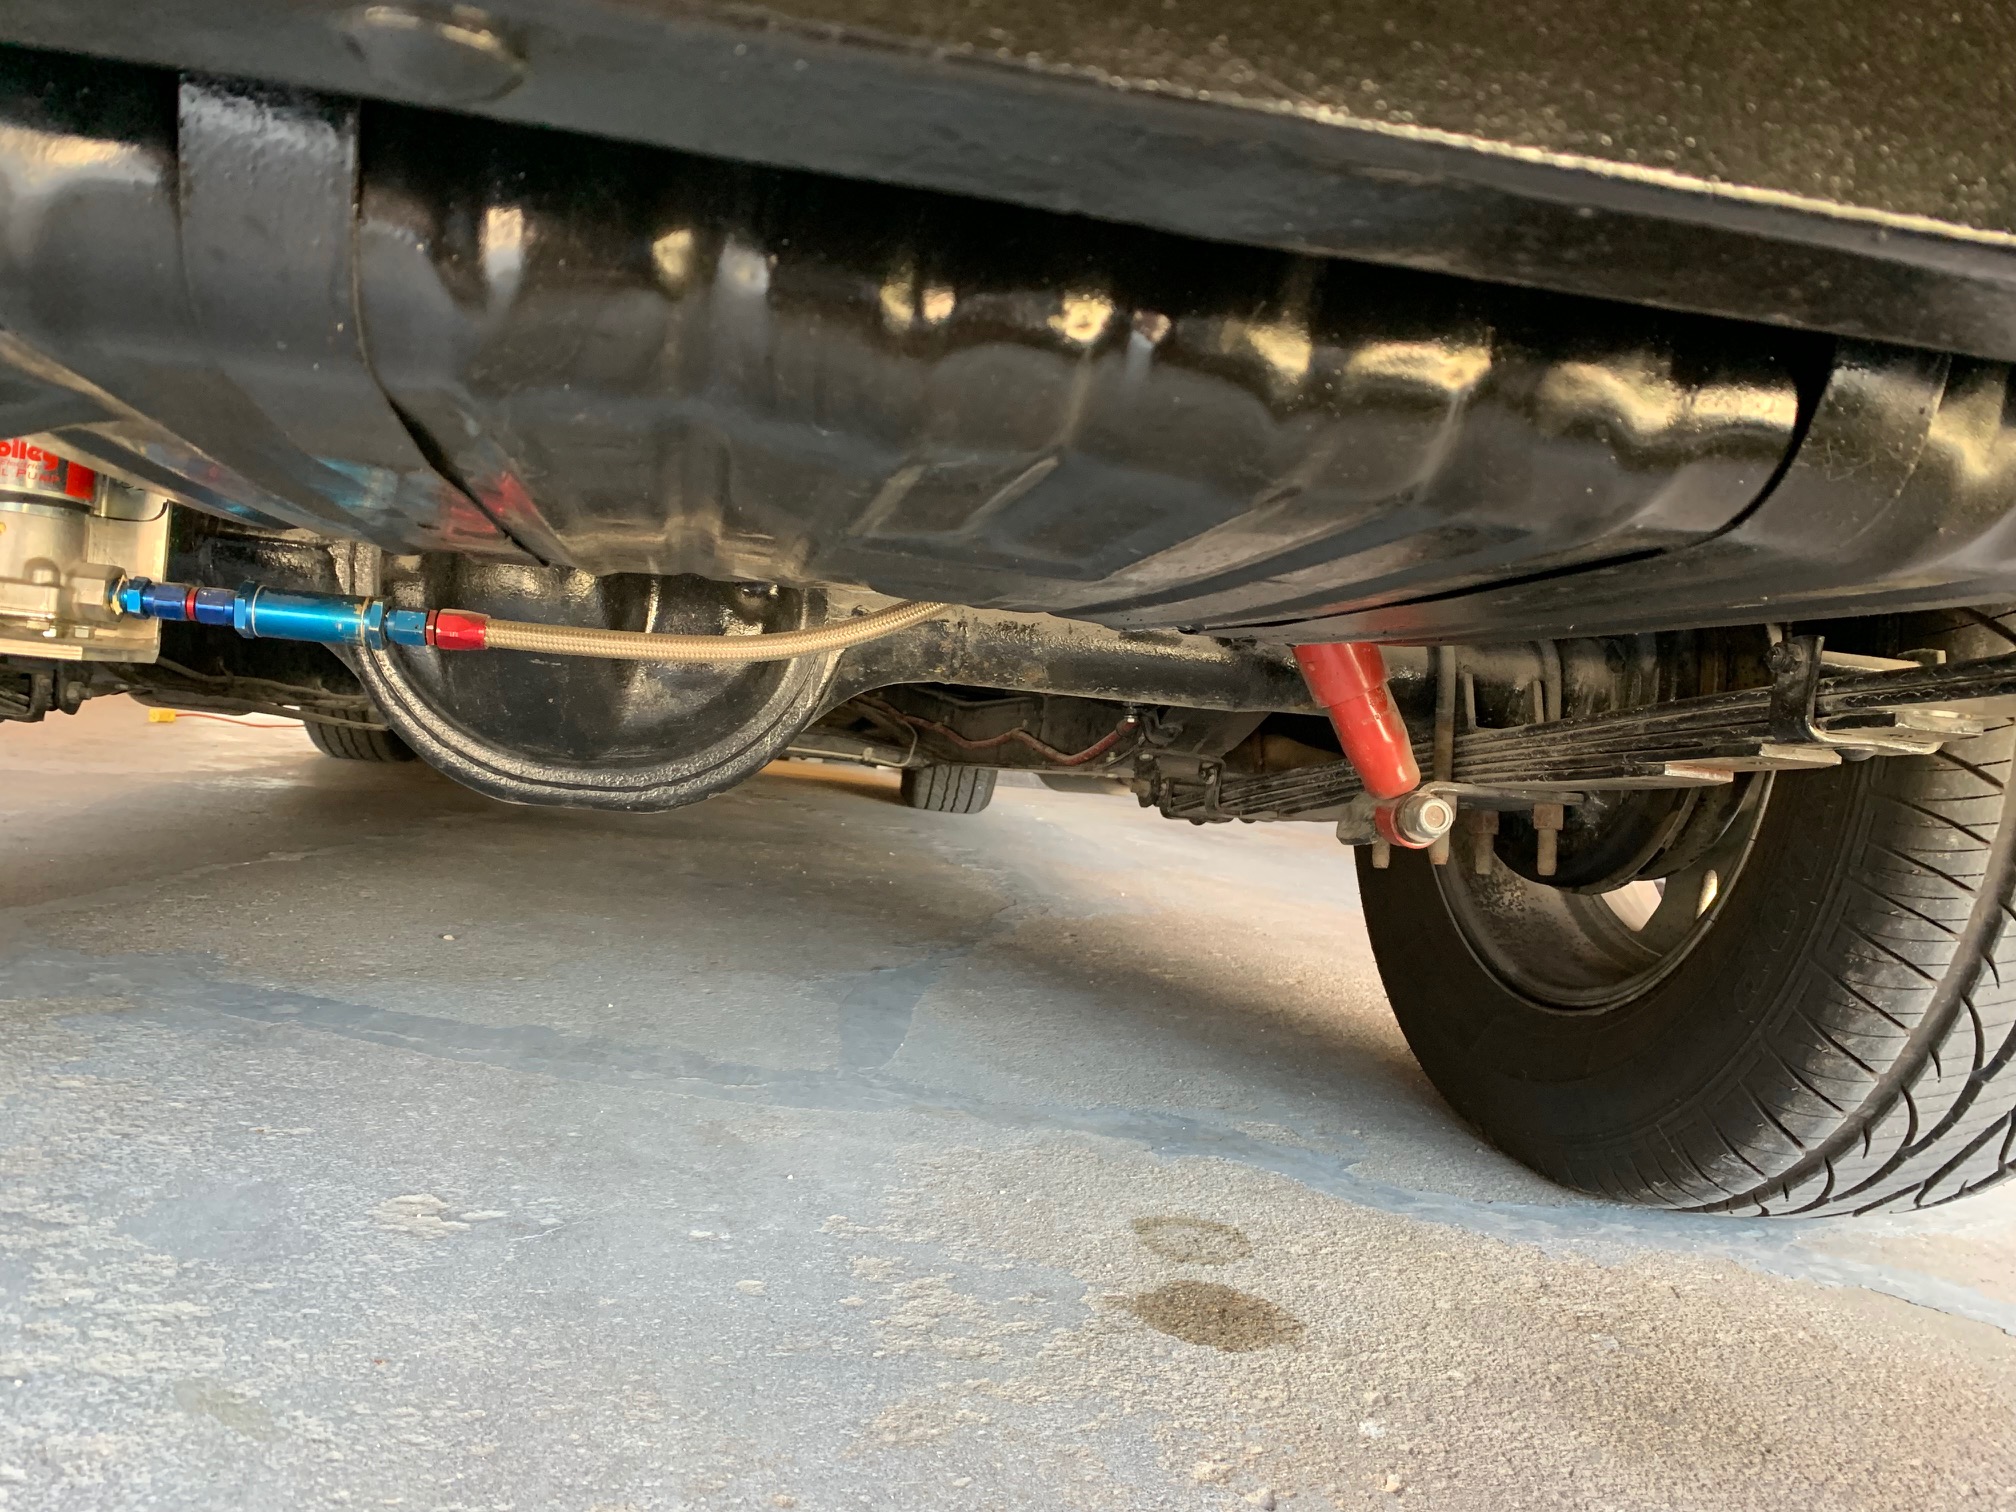
Gas tank and fuel pump
Everytime that I fill the car up with gas, it leaks where the spout is attached to the top of the tank! The tank will have to be lowered to fix this problem (new gasket). At the same time, I would like to move the fuel pump so that I can extend the exhaust system out the back instead of exiting in front of the rear tires.
September 20, 2020
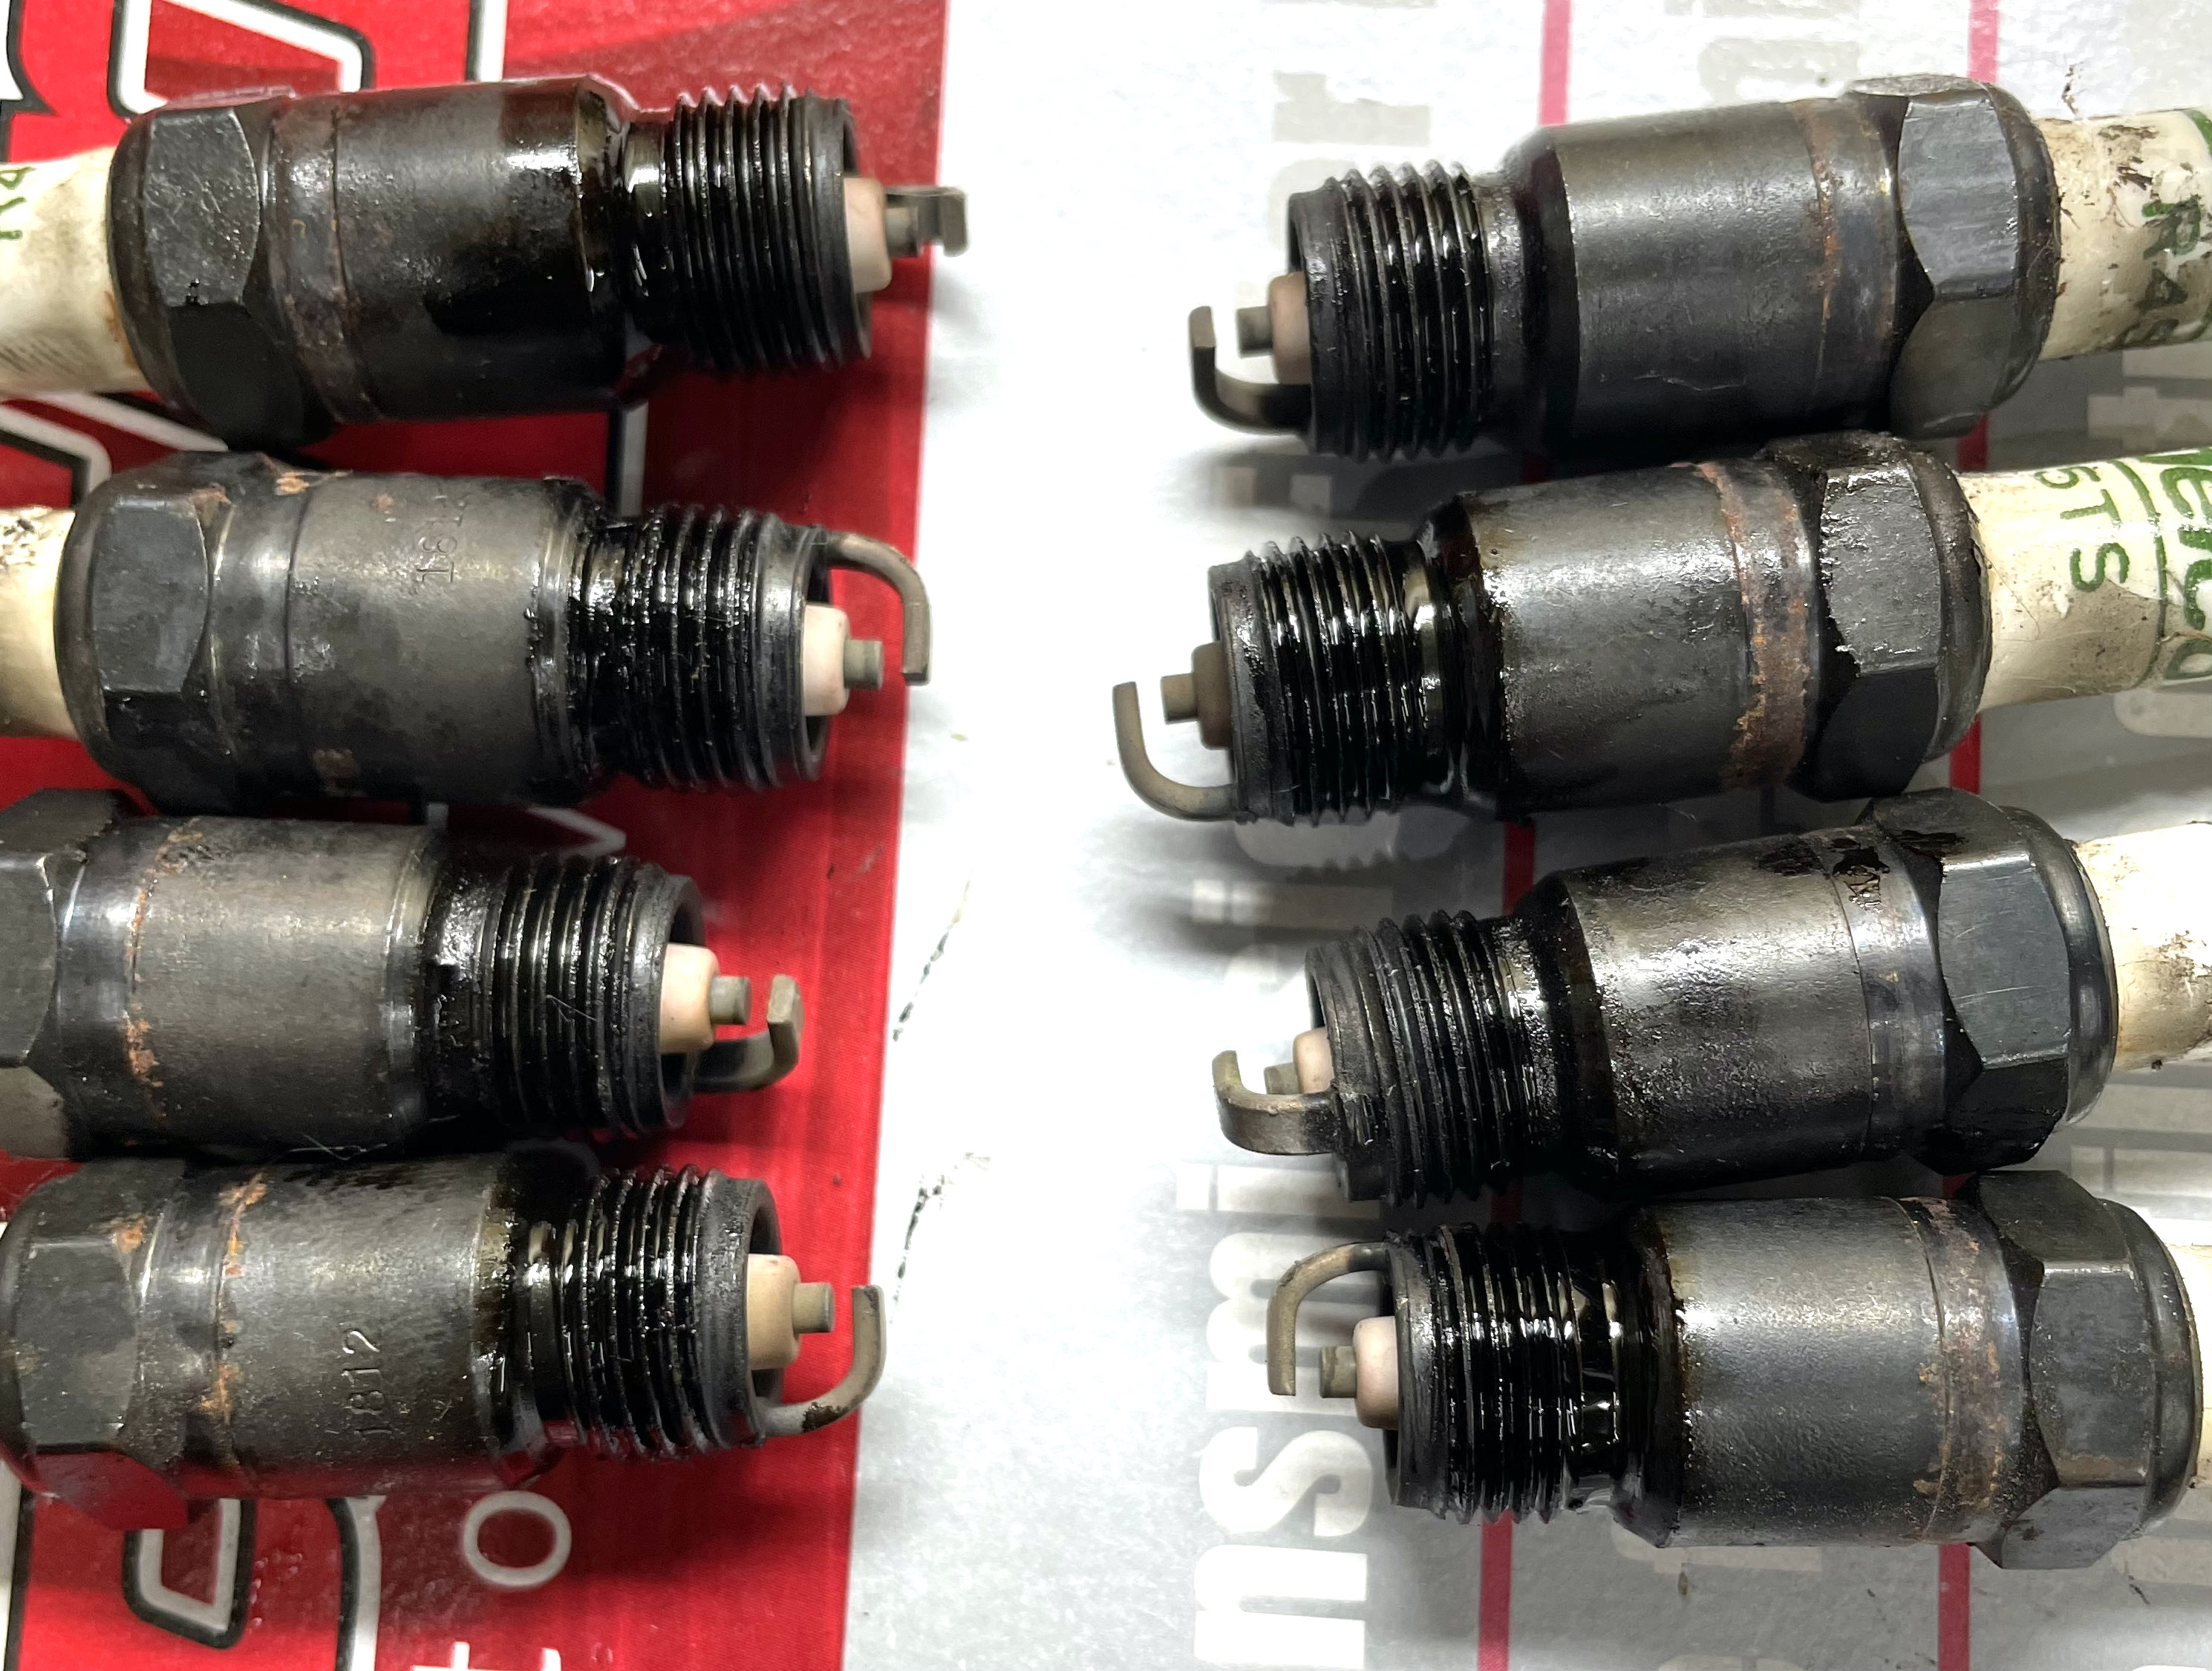
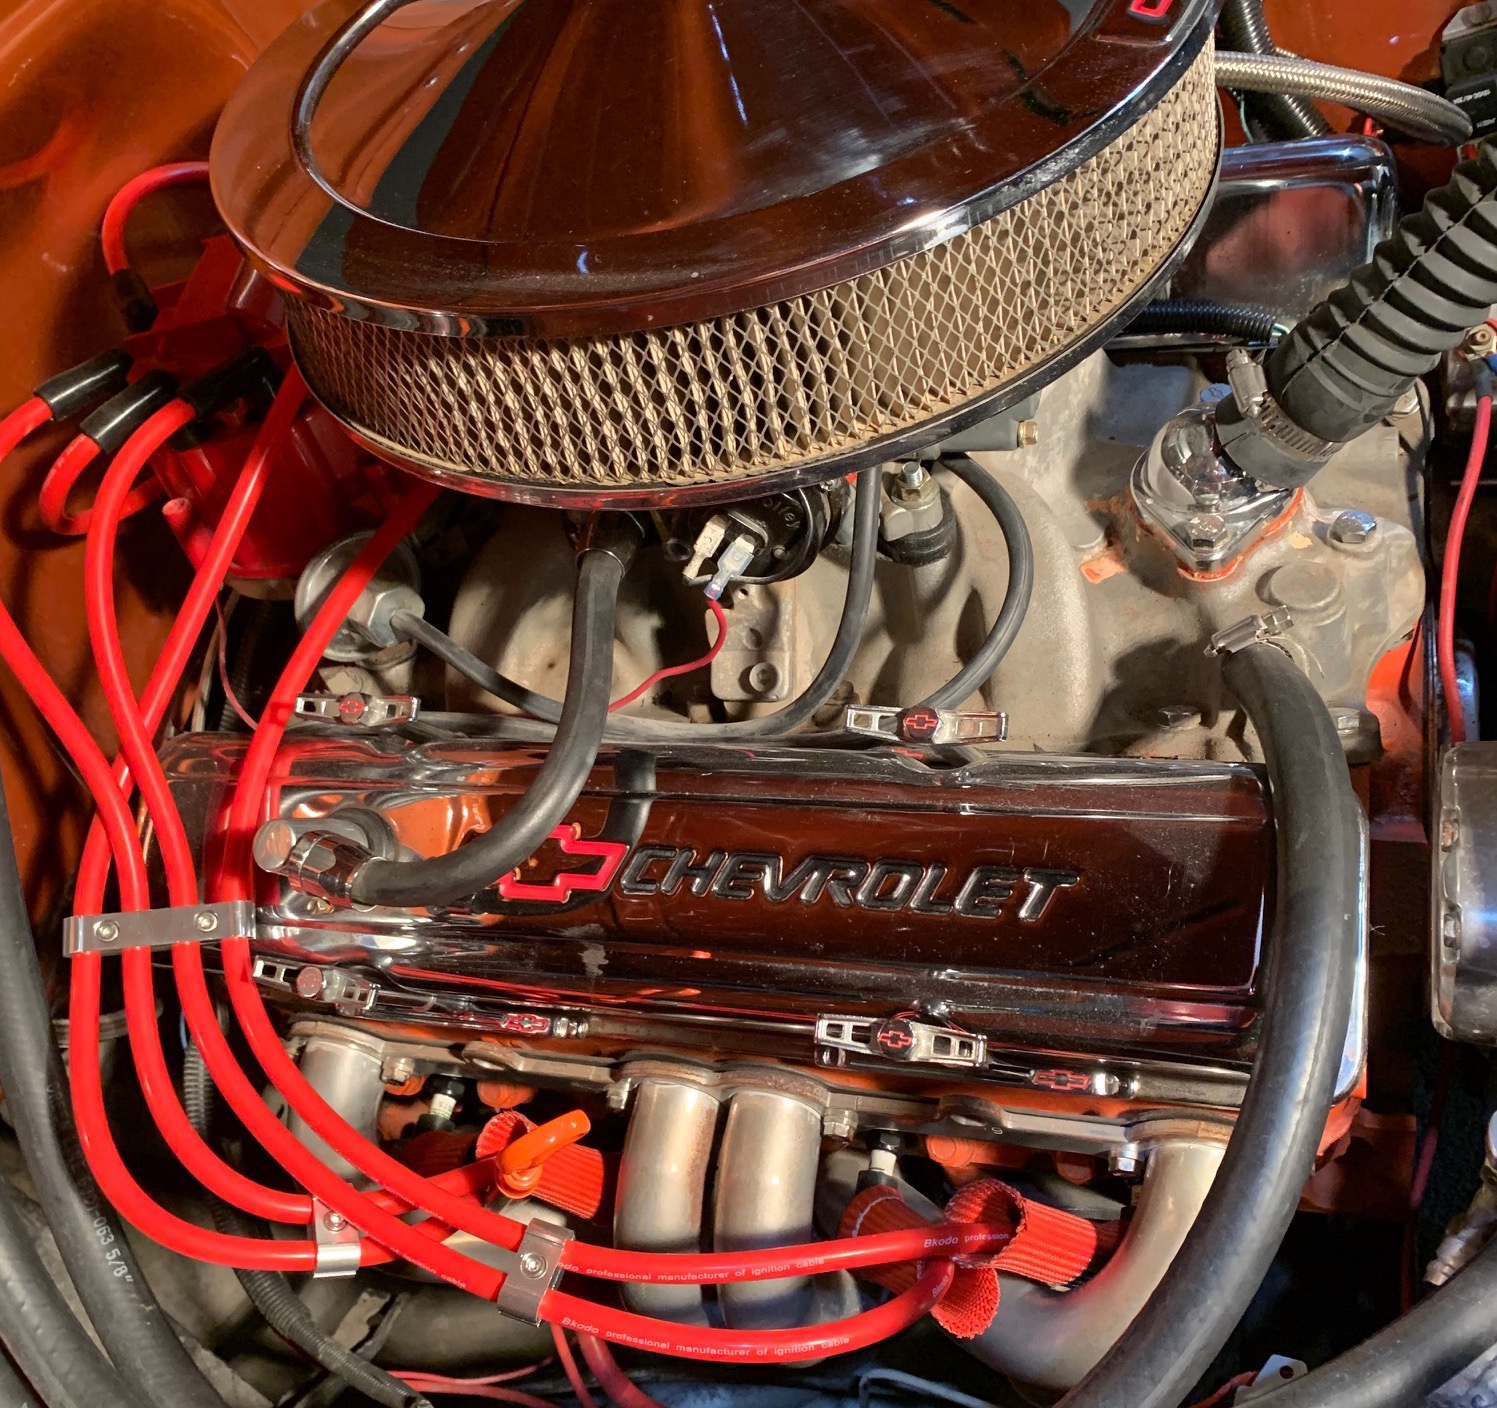
Spark Plugs and cables
I developed a burnt spark plug cable that was too close to the headers. I decided to change all the spark plugs and cables and re-adjust the spark plug cable boots. When I had the plugs out, I took cylinder readings of each cylinder.

July 28, 2020
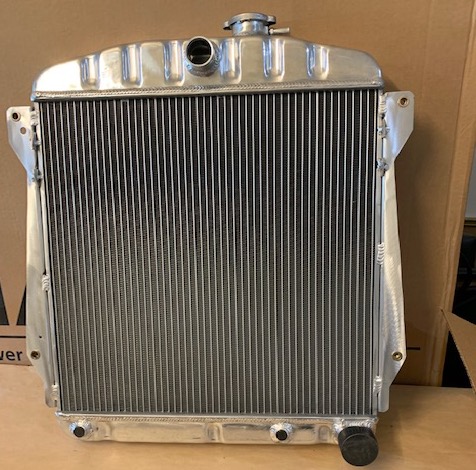
Radiator (part1)
Last weekend I drove the car out to Fannystelle, MB (a distance of about 40km). The temperature of the motor rose to about 200. When I drove back to Winnipeg and into my garage, the temperature had risen to 240 and gurgling when I shut the car off! It is time that I re-evaluated my cooling system. I took the radiator out of the car and took it to a radiator shop. They informed me that it did not leak but that it was highly corroded and plugged. They suggested that I re-core the rad (for the second time) for a cost of $780 plus tax. I decided that I would order an aluminum radiator from EBAY. I also decided that I would move the rad ahead enough to allow the installation of a puller electric fan (I got a 16" one with the Vintage Air that I never installed). I would keep the pusher fan in the front and re-install the A/C rad. More pictures to come!
August 22, 2020
Radiator (part2)
I got my new aluminum radiator (via Running Red parcel service from Pembina) last week. I took the Vintage Air puller fan that I got with my air conditioner unit and attached it to the new rad. I had to make a few adjustments to the shroud to make it as close a fit to the rad as possible.
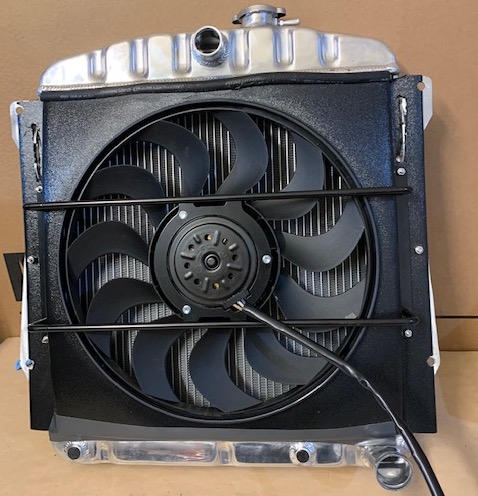
Once the two were attached, I could not get them into the radiator housing because of the top bar on the radiator housing. Since it was welded on, I had to break it off with a chisel and hammer. Once I got the combo in the car, I bolted the bar back on! I had to move the rad ahead about an inch to get it to fit with the puller fan. As a result I had to cut the lower pan and the top radiator baffle. It turned out pretty good.
I also re-installed the condenser in front of the radiator. I had to cut some additional metal on the front splash pan to make it fit!
June 24, 2020
Carburetor
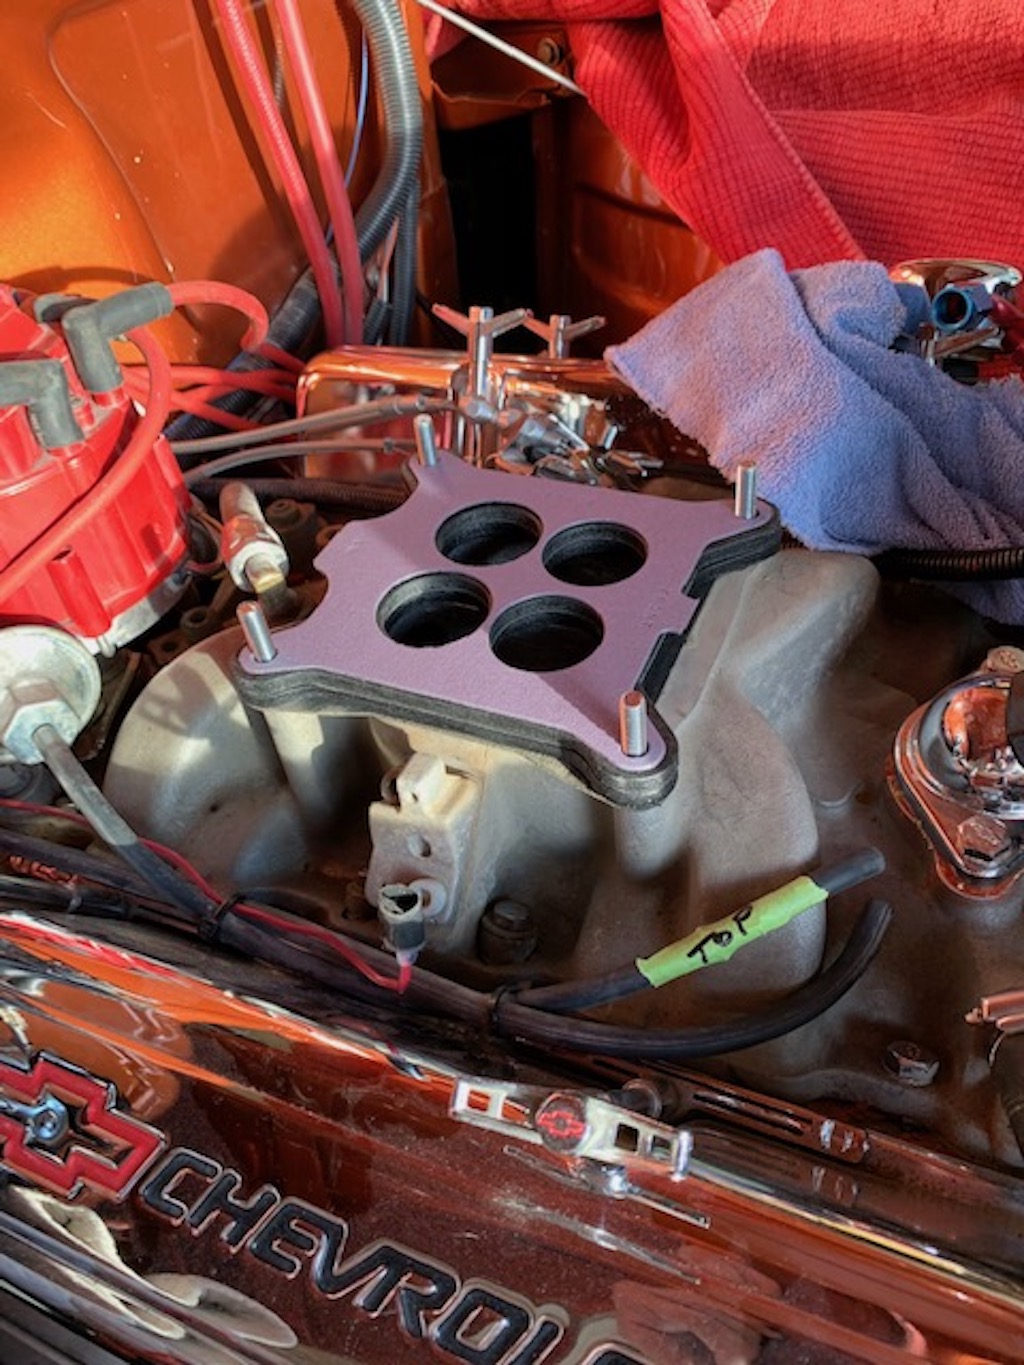
The car runs rough when it gets hot. I decided to install spacers between the intake manifold and the carburetor.
Here is a picture of the carb with the first gasket:
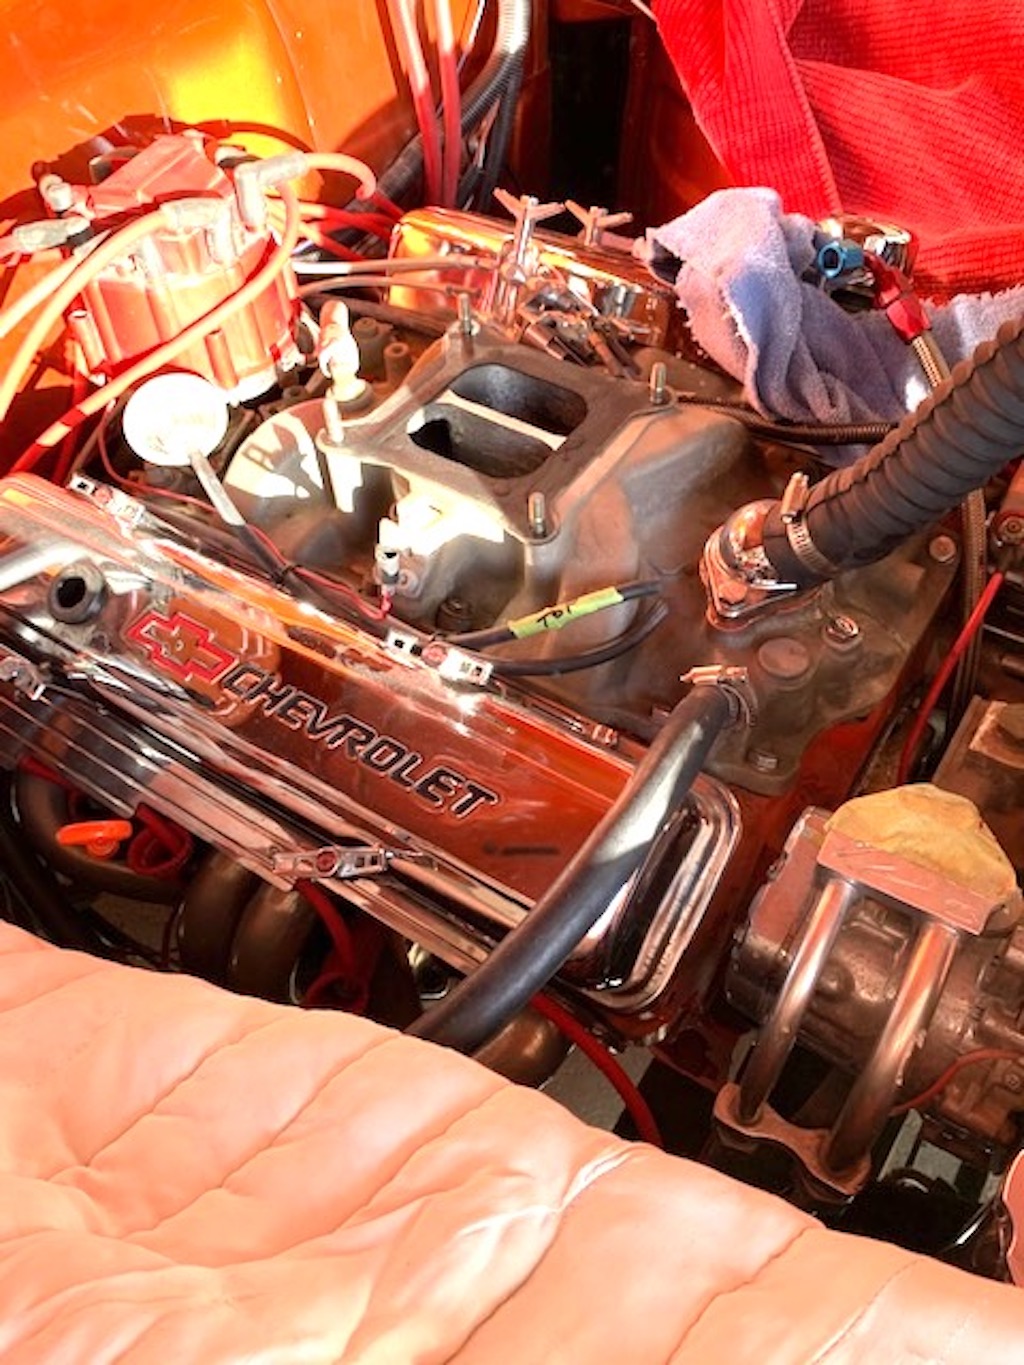
Here is a picture of the carb with two 1/4 inch spacers:
June 15, 2019
The GM305 motor timing
The car is not running smoothly, so we decided to check the timing. We used whiteout to mark the "top dead center" on the harmonic balancer (has a groove on it). We then connected the timing gun (pulled the vacuum hose off) and started the car. No matter what we did, we could not find the timing mark!
We decided to try something new: We pulled off the distributor cap and keyed the engine until the rotor was pointing to #1 cylinder spark plug. We then put a new whiteout mark on the harmonic balancer next to the chrome marking gauge attached to the motor. We put the rotor cap back on and connected the timing gun. We started the engine and used the new mark to adjust the distributor.
Now the car runs smooth on idle but very rough when put in gear with the brake on!
I put it in gear around the 14 second mark and back into park around the 37 second mark.
June 3, 2019
The Holley 600 carburetor
The car continuously stalled when stopped at lights or stop sign!

When we took the air breather off, we could see a build up of fuel in the back of the carb! The carburetor was running too rich and stalling the car. We took the float out and determined that it weighed more than usual. We put in a new float and set up the carburetor.
September, 2018
The trunk handle and lock
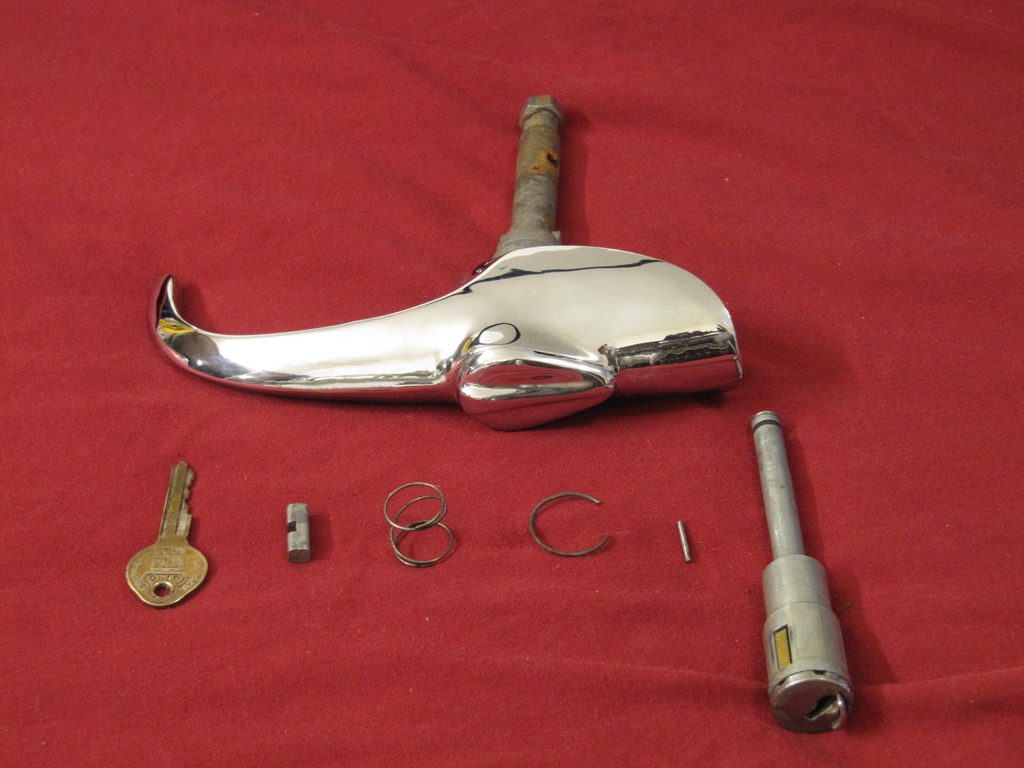
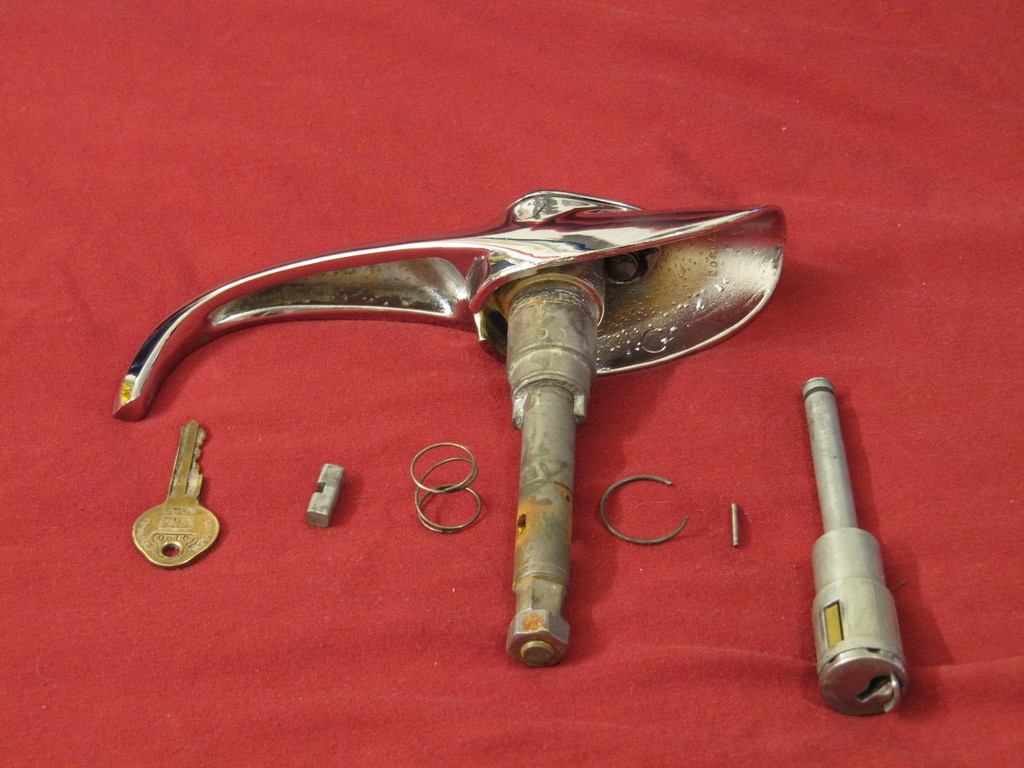
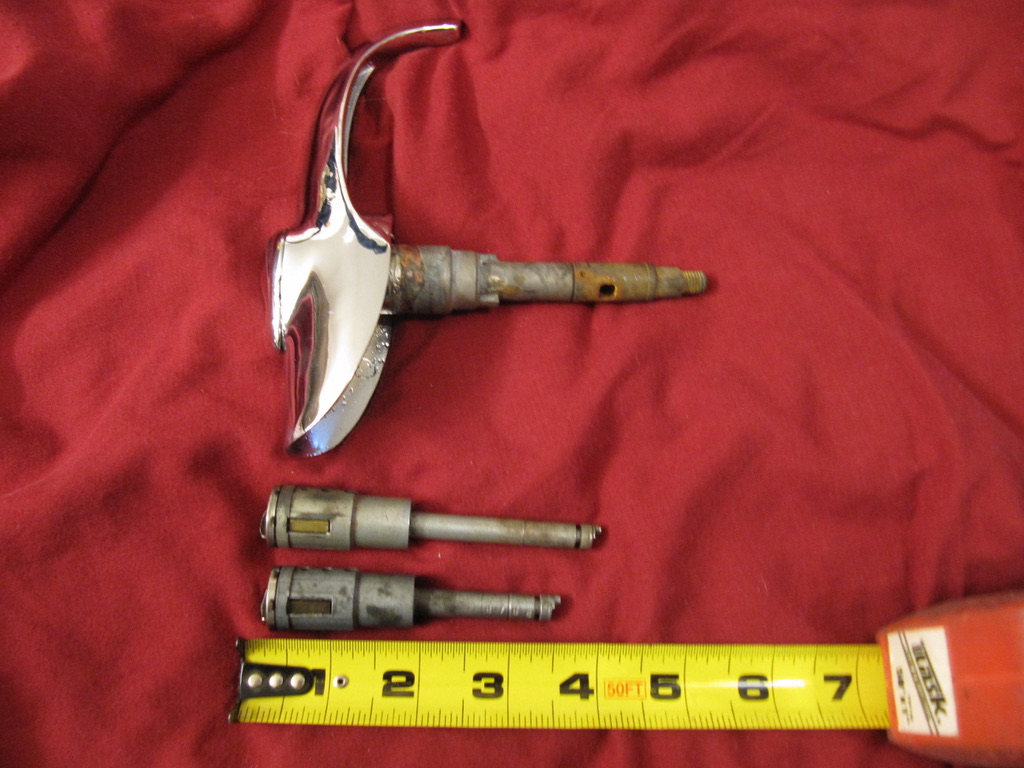
I figured out how to change the shaft and copied an extra GM key. I also discovered that the key does not come out when unlocked! I searched on Google and am still not sure that this is proper operation. I found a youtube video on how to change the lock:
Near the end of the video, he filed off the gold bar to allow the key to be taken out. Does this really work?
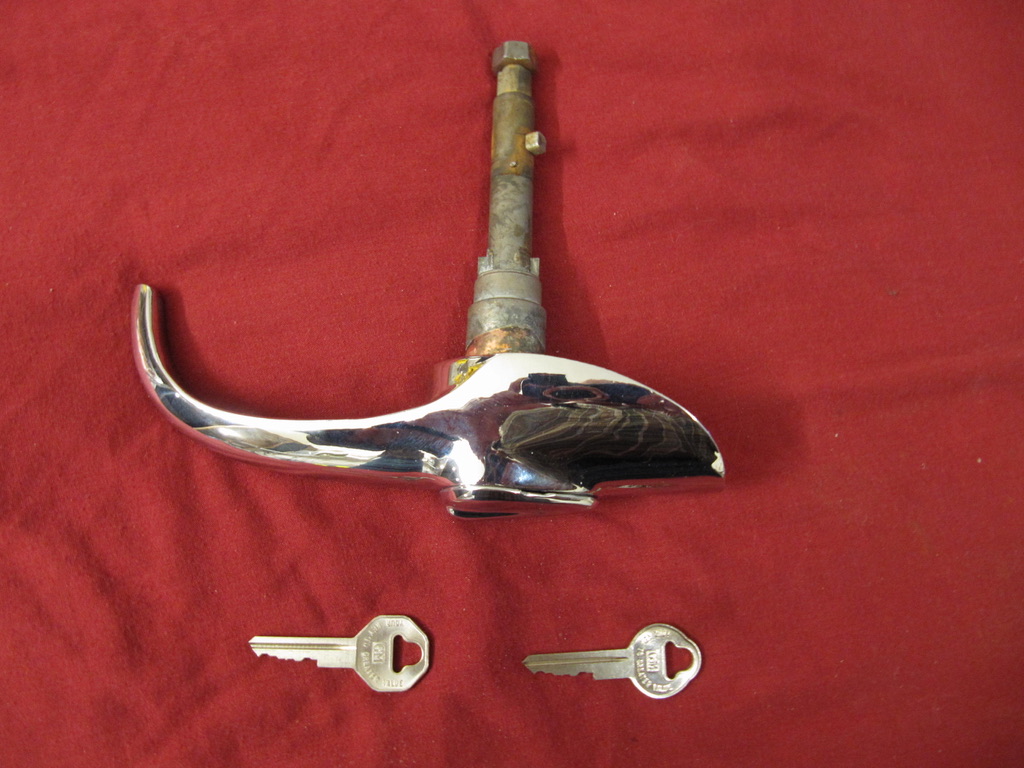

The picture above shows the only position of the lock where the key can be removed.
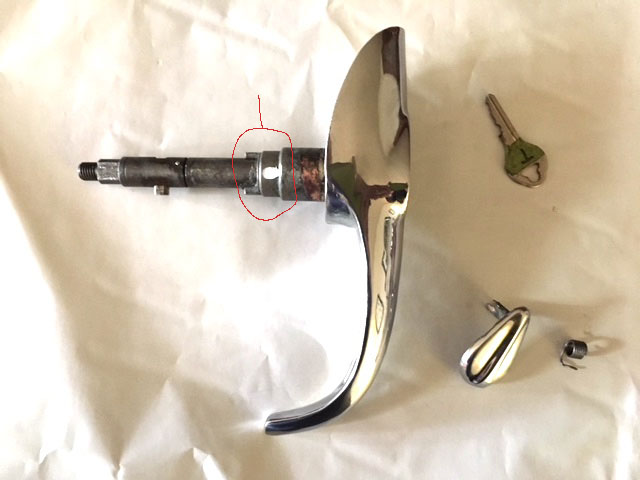
The picture above shows a second problem with the shaft. The handle turns without the smaller shaft turning. It seems the chrome or welding gave way (in the red circle). We tried putting a pin in the shaft (the shiny circle), but it did not hold. Can this part be welded???
The answer is no. The shaft can not be welded because the handle is pot metal and the shaft is steel. I visited a friend and he mixed some airplane glue together and put it on the shaft.
The airplane glue held for all of 5 seconds. I took the handle to Anything Custom on Waverley and had them silver solder the steel shaft to the handle. That held for 5 minutes before it let go. I next had the welder mig weld 2 bumps on each side of the steel shaft. That seems to hold for now!

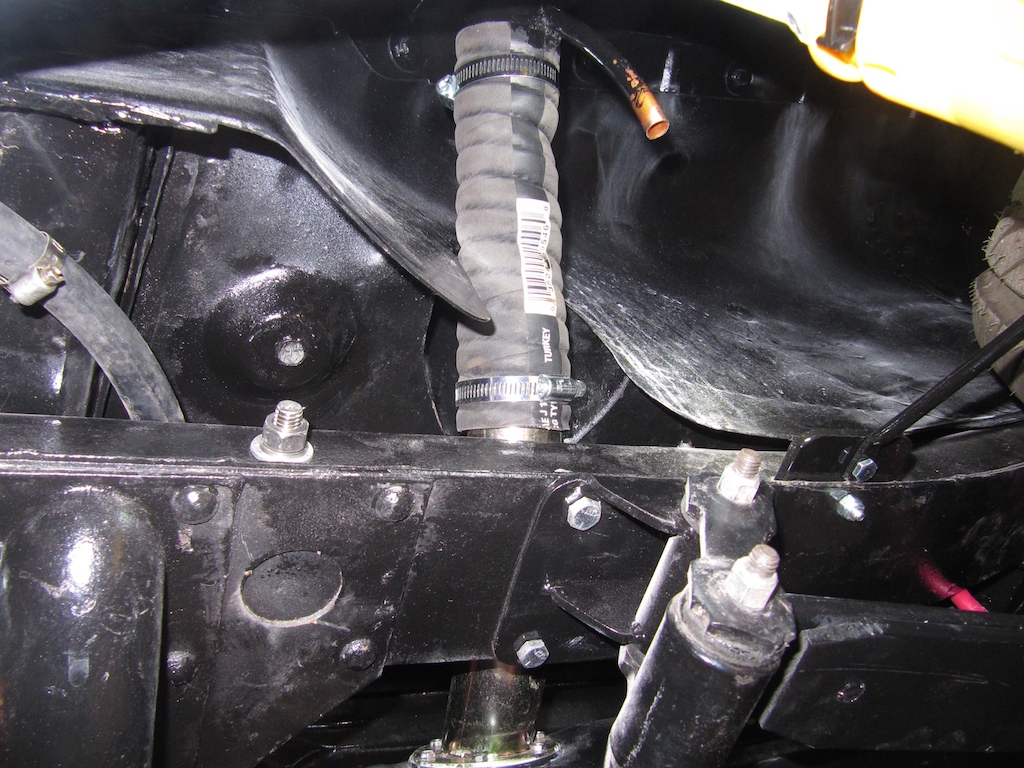
Top radiator hose
The top radiator hose leaked at the rad end. I tried tightening it and tried changing the inside rubber but I could not stop the leak as shown in the video below:
I never noticed the leak before because the radiator was never filled to the top! I ended up changing the entire hose with a regular rubber hose. This stopped the leak.
August, 2018
Every time that I start the car now, it runs well for the first 5 to 10 seconds, then it goes all to crap!
I decided to take the fuel pump apart.
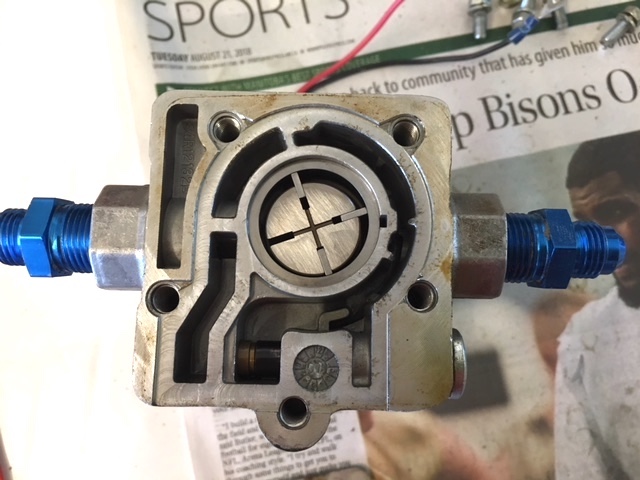
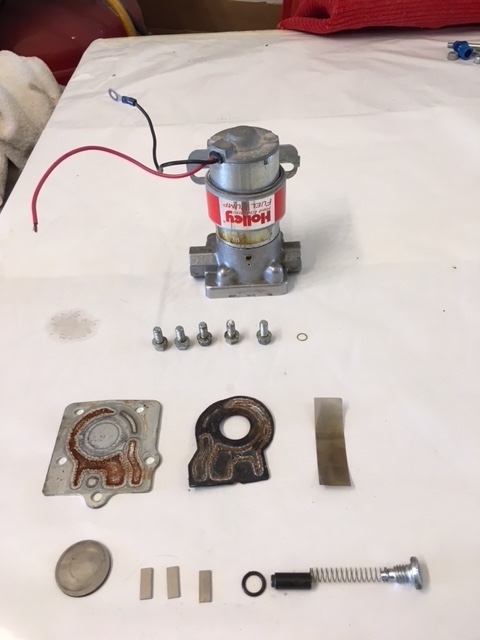
The car is back to running great with a new fuel pump!
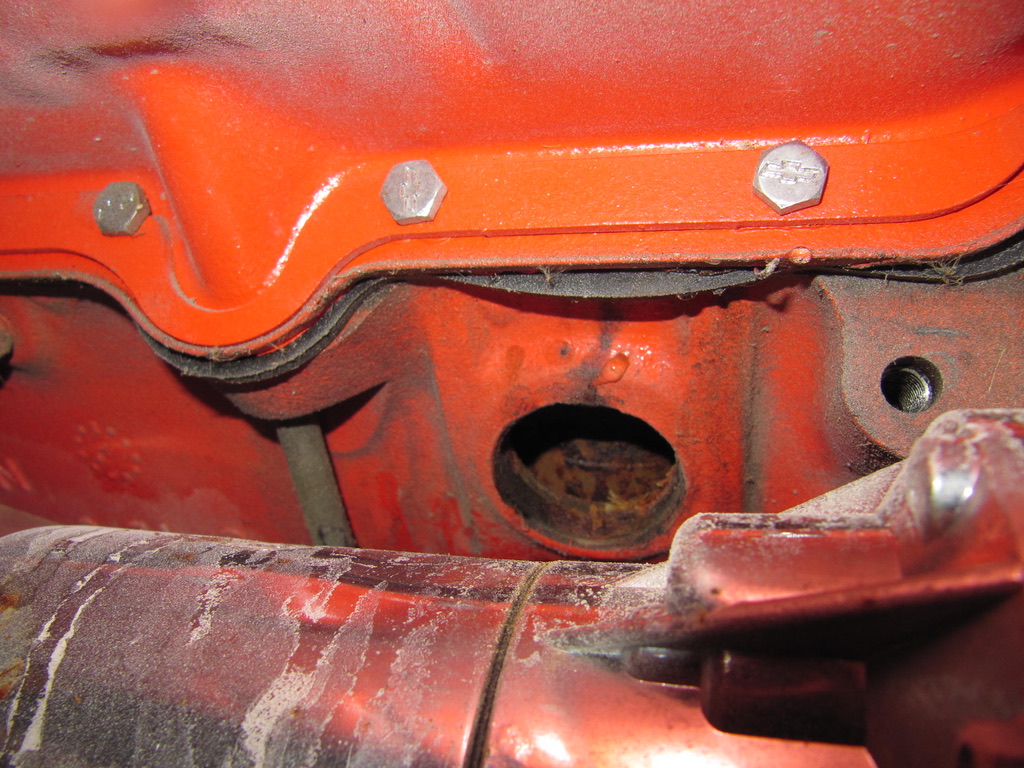
February 1, 2018
When I finally got the car home, I decided to start it to get the oil moving. The temperature gauge increased very quickly, so I shut the engine off. I thought it might be low on coolant, so I started to add water. The water immediately poured out at the rear of the motor. Upon closer inspection, I discovered that the rear frost plug was missing!
February 10, 2014
When I installed the gas tank (about a year ago), I created a problem of my own doing. I neglected to install the rubber gasket and all the screws that connect the spout to the tank (what was I thinking). As a result whenever I poured gas in the tank, it would leak out between the spout and the tank.
I decided to attempt to fix the problem by lowering the tank, disconnecting the existing screws, and install the gasket - all with about 5 gallons of gas in the tank and without disconnecting any gas lines.
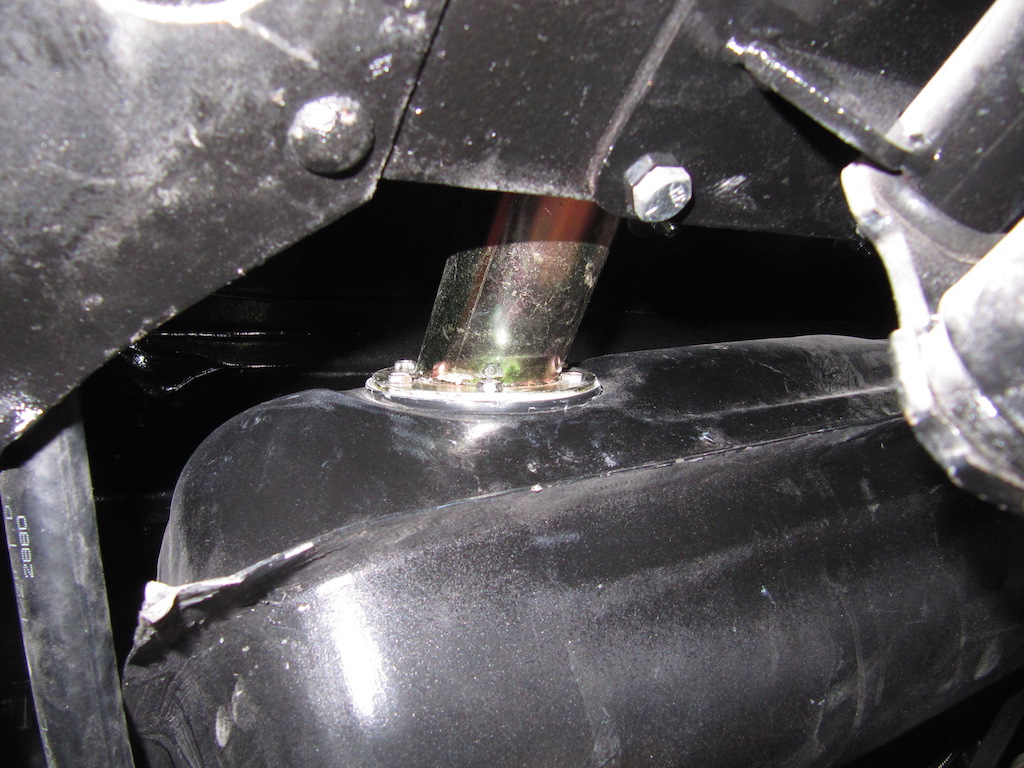
I reconnected the spout to the fender and the air discharge line and raised the tank back up and re-attached the braces. It was very hard to work with the in-flexibility of the gas tank rubber hose.
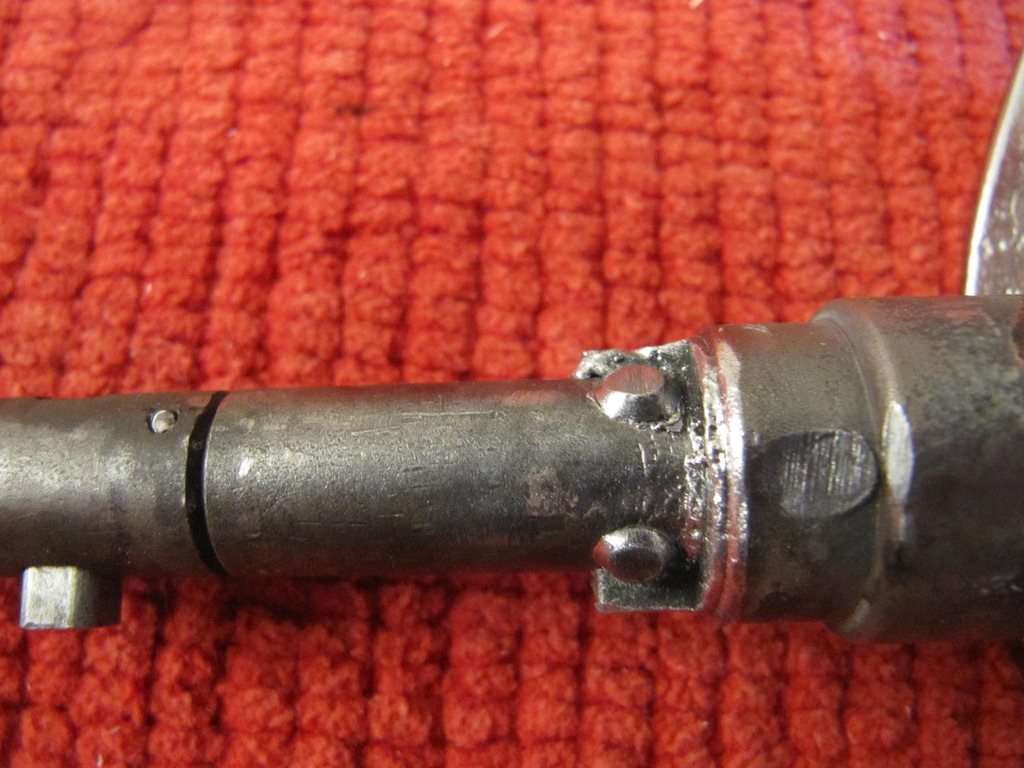
November 6, 2013
When I am idling the motor and increase the RPMs, all hell breaks loose!
I tried it with all the belts off (no A/C, alternator, water pump, or power steering pump) and it did the same thing!
See the 2 videos of the noise here - video
Apparently the people who dropped the motor into the frame did not connect the torque converter to the flywheel and neglected to tell me! I went to Seven Oaks Transmission and got the proper bolts to connect the torque converter. Worked fine after that!
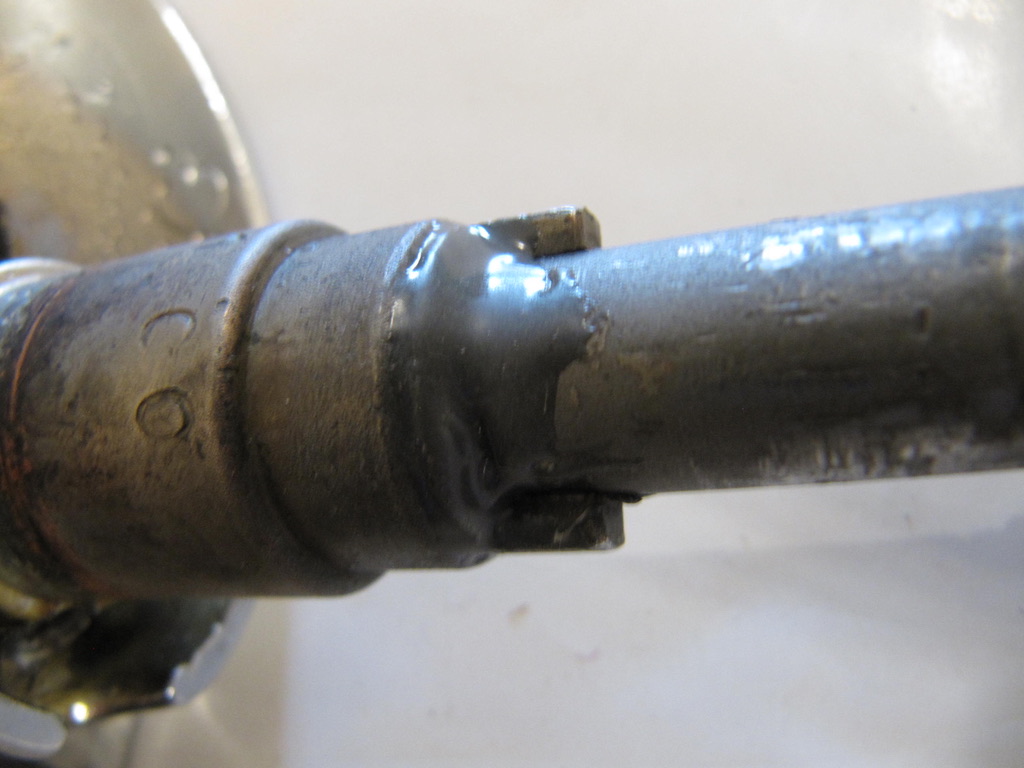
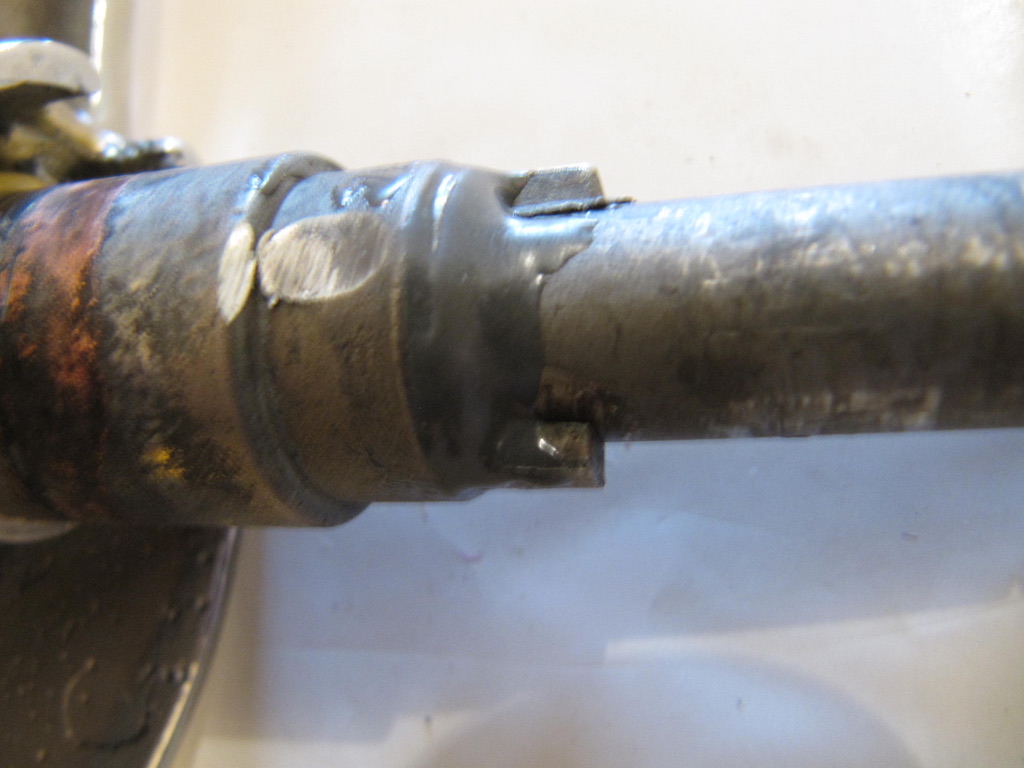
July 9, 2013
When I tried to connect the linkage for my steering column, I found that the steel steering shaft hit the header. I needed to increase the length of my steering column by adding 8 inches of 3/4" DD shaft in the hollow part of the column shaft then adding a 3/4" DD to 3/4" DD u-joint, another 3/4" DD shaft and finally the u-joint on the rack.
July 7, 2013
I originally purchased a Borgeson steel vibration universal joint for my steering linkage that had a spline to 3/4" double D conversion (about 2 years ago). Upon further inspection of my Heidts rack and pinion, I found that I required a Mustang "V" to 3/4" DD u-joint. The Mustang "V" rack is very seldom used and even Mike at Sandales was surprised at the setup.
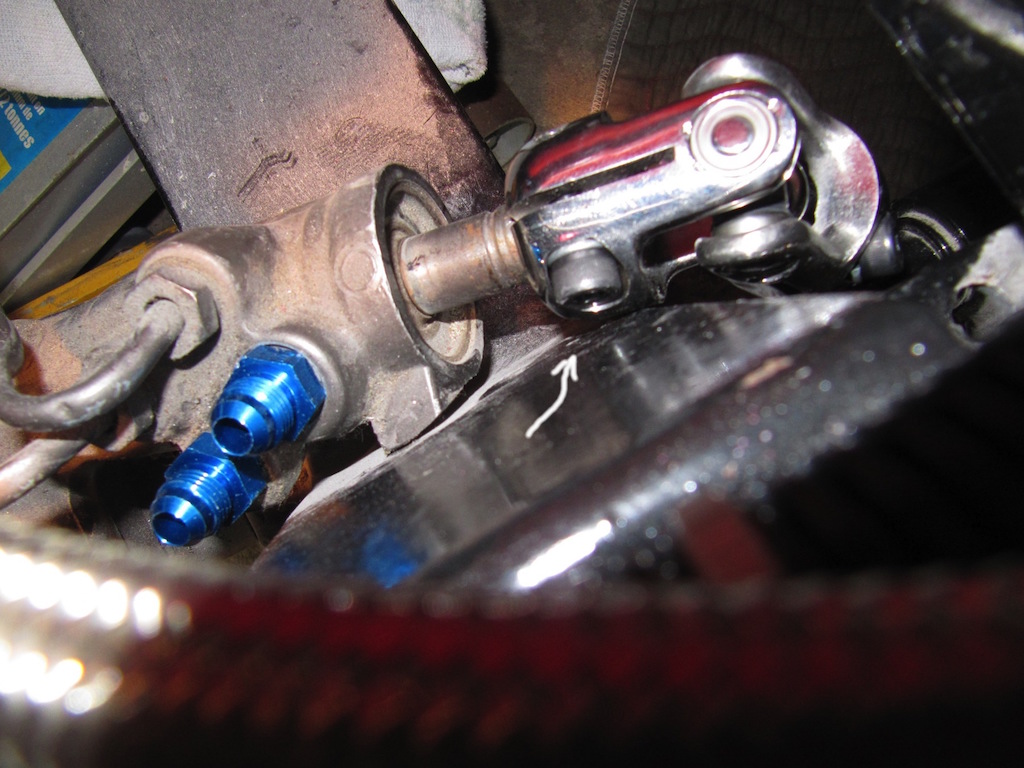
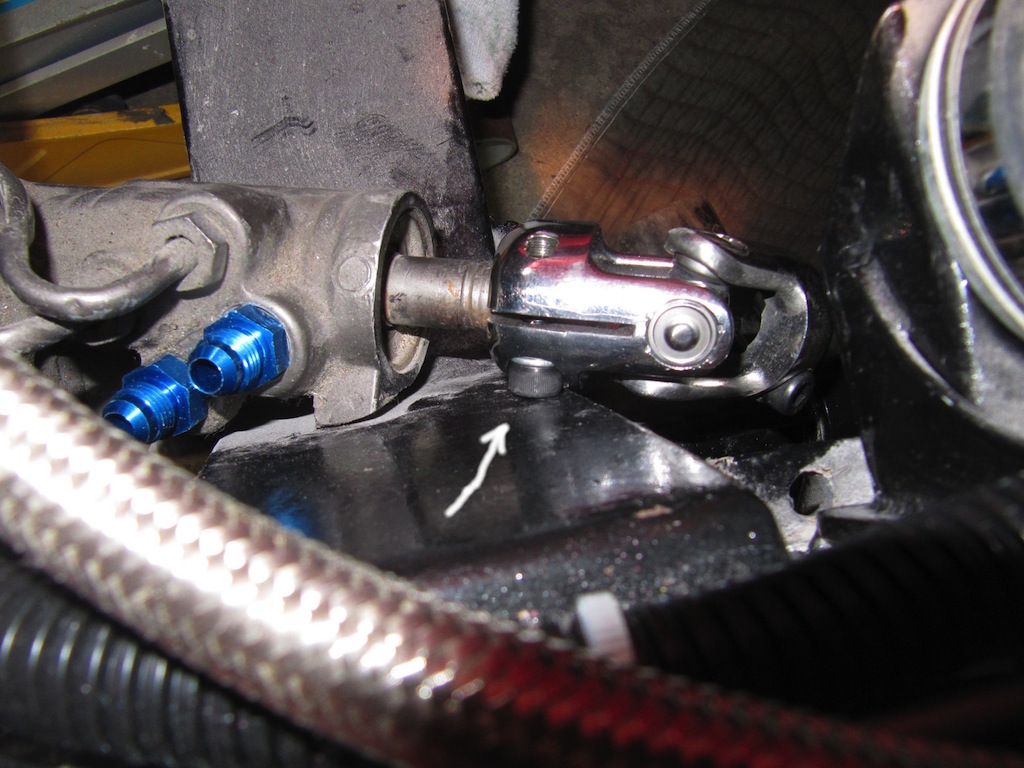
When I installed it , I found that I had a clearance problem with the IFS cross-member as shown in the pictures above.