Air Conditioning Unit
When I started planning how to retrofit my stock Chevy into a streetrod, I always intended on installing an air conditioning unit in it. I planned on driving my car for several hundred kilometers (miles) throughout the summer months and I wanted to do that in comfort.
For my application I chose the Vintage Air 61005-VUZ-A Super Gen II W/DEF 349471 which I purchased thru Gearhead World.
The Evaporator
In a lot of this installation, I had to make a lot of "executive" decisions on where to mount the various parts for this system. I am sure there is a right way and a wrong way, so hopefully I did it the right way. I started by doing a lot of surfing on the internet. I bit the bullet and started drilling the 4 holes in the firewall for the bulkhead connector. I then mounted the bulkhead and the inside connectors on the firewall.
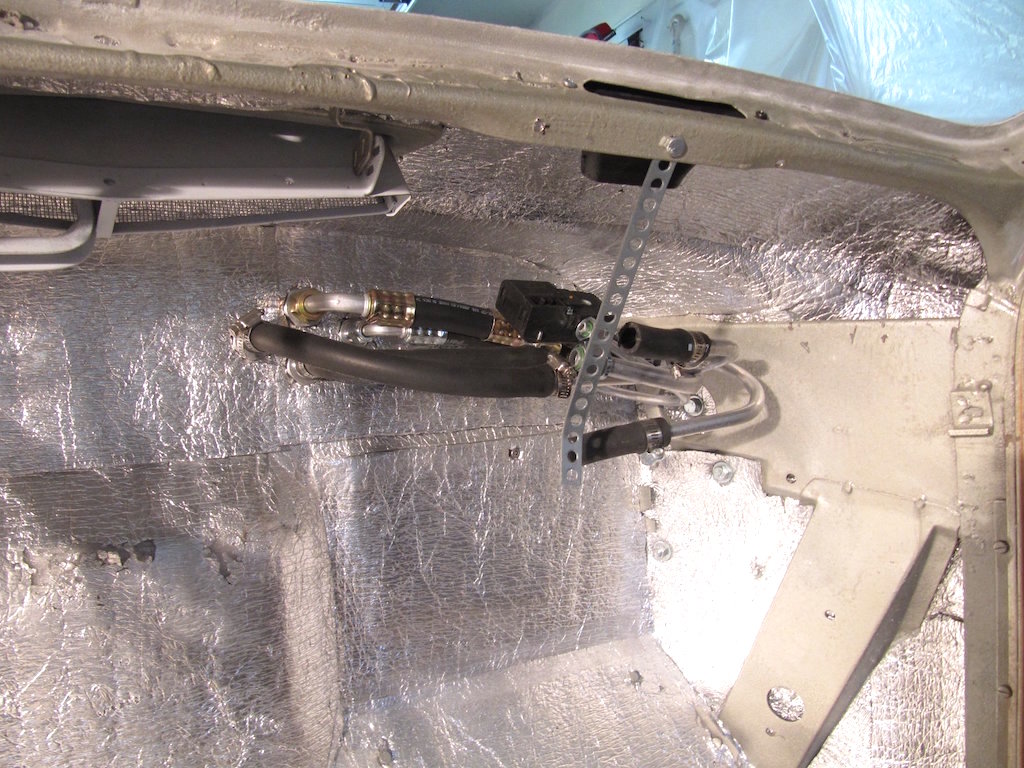
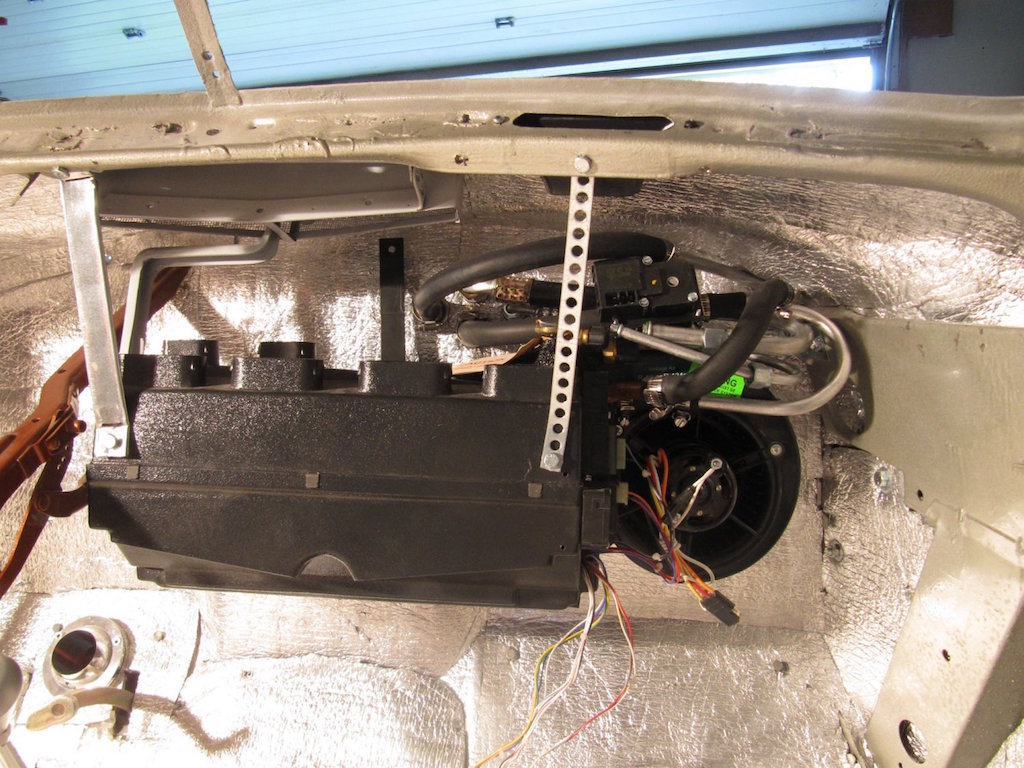
The picture below shows the rat's nest of hoses and clamps that had to be installed in a very small space! The evaporator and the compressor come sealed with nitrogen to prevent them from drying out until they are to be used. For this reason, the final connections have not been made to these 2 components at this time!
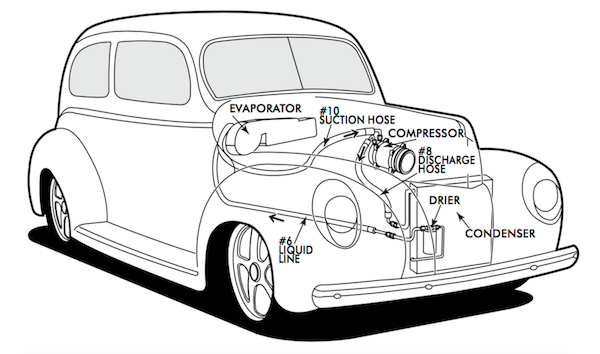
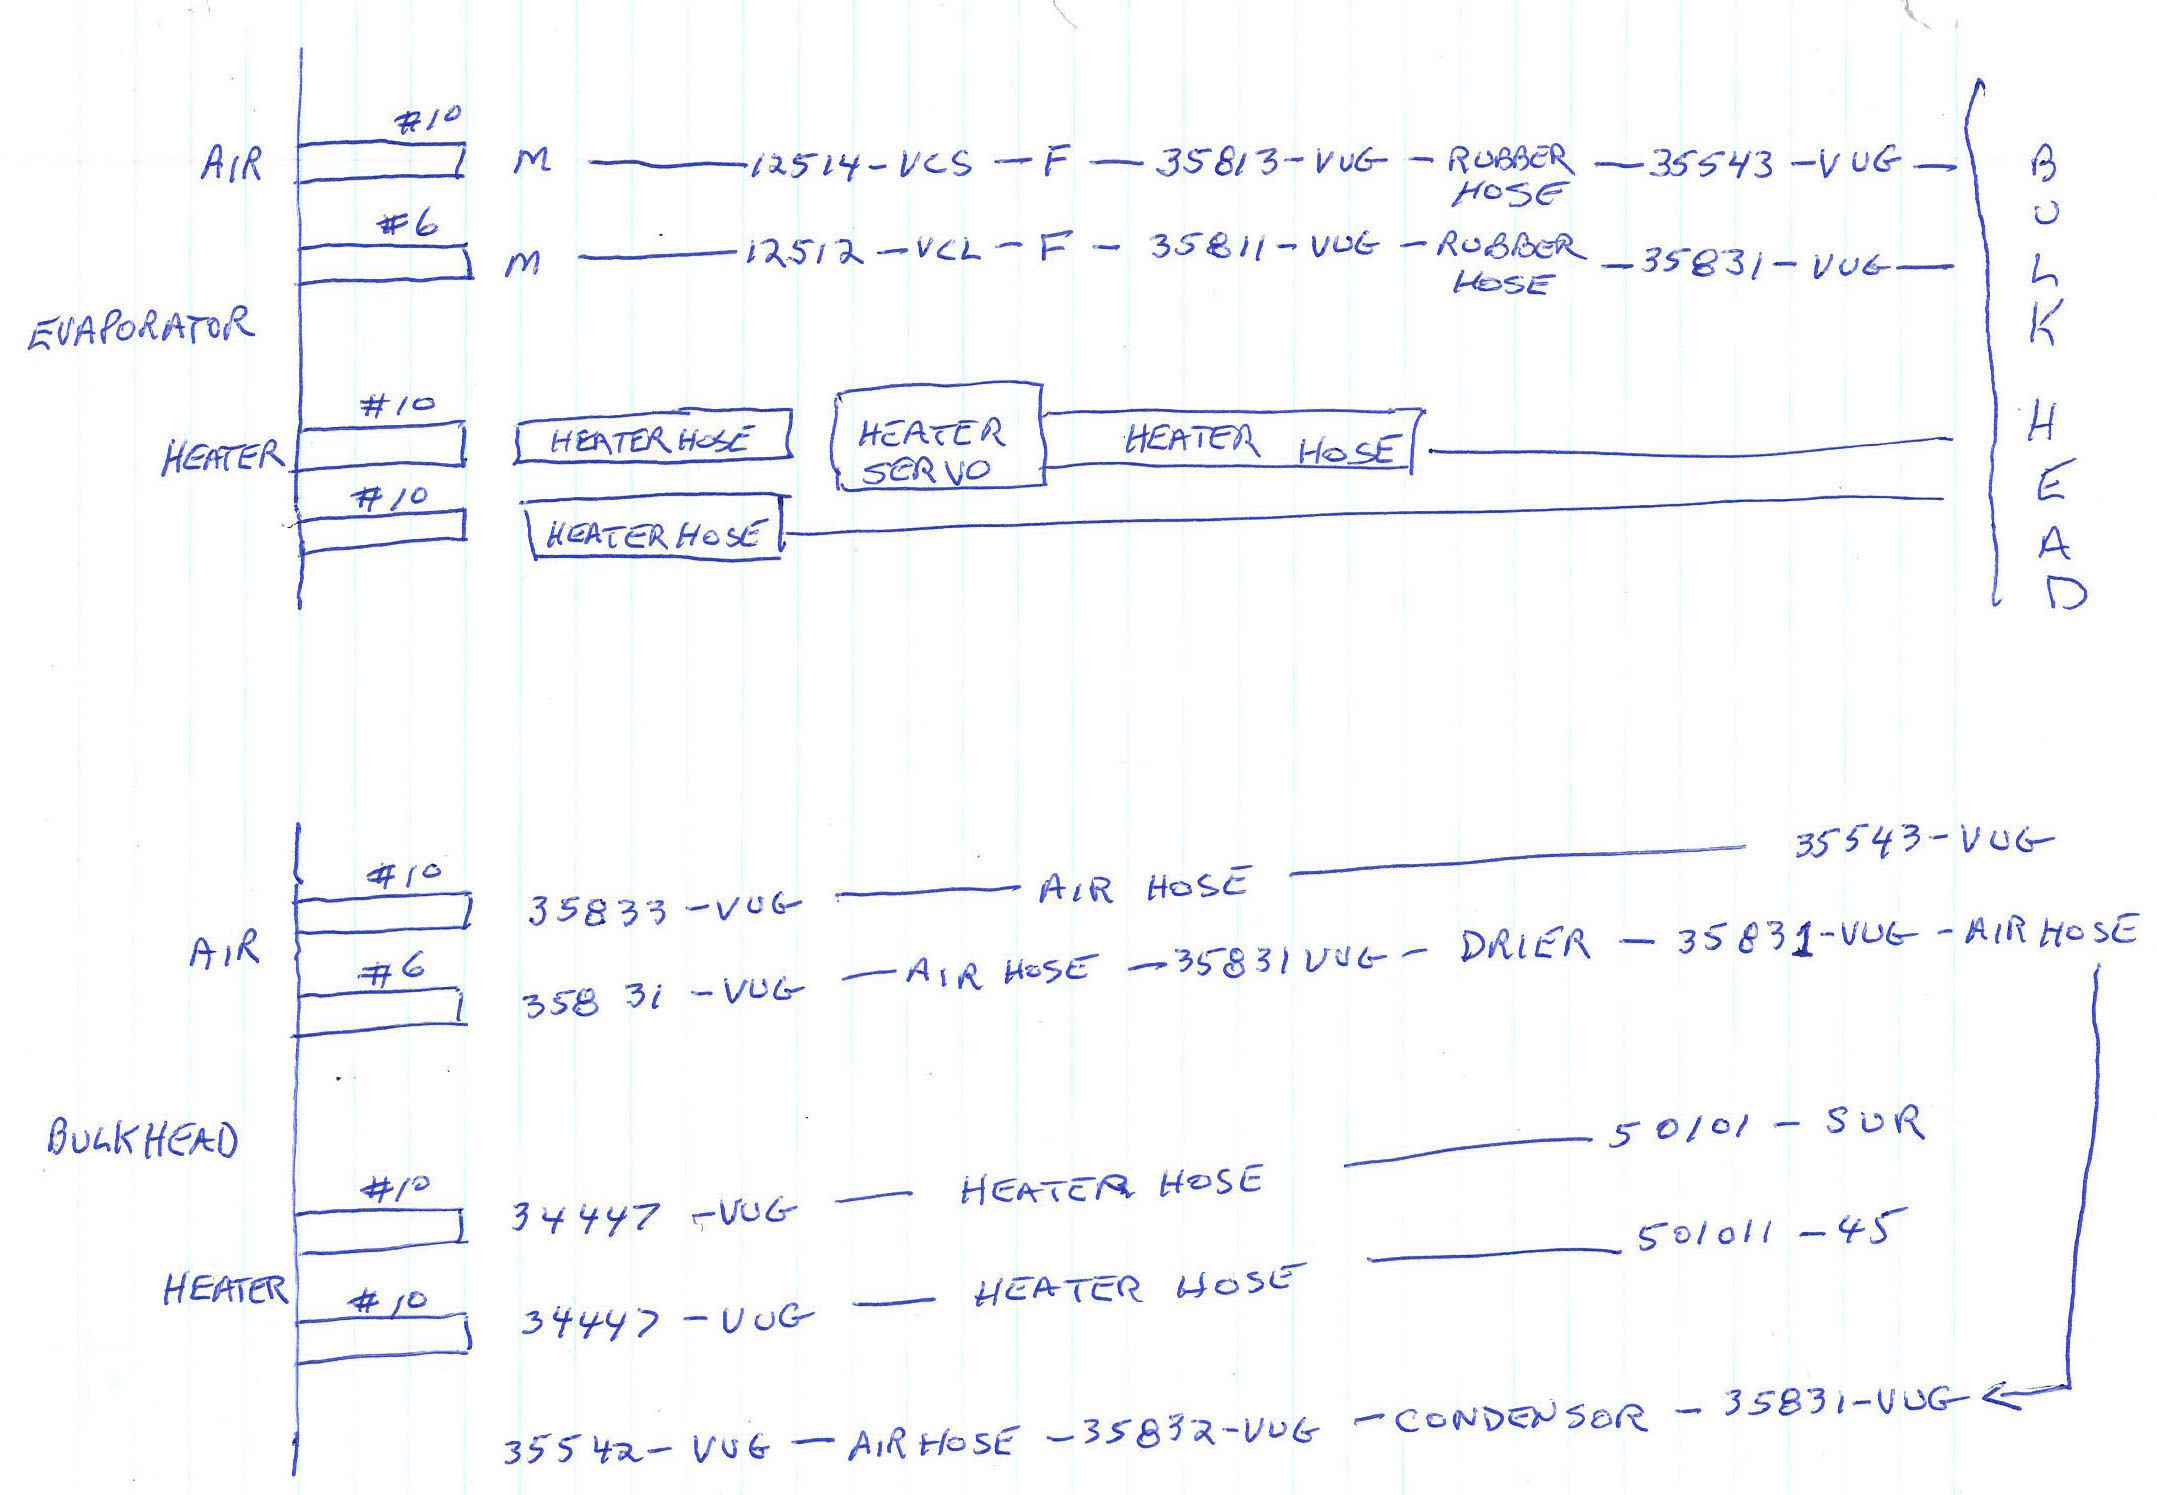
This picture shows my cheat sheet of the connectors and where they go.
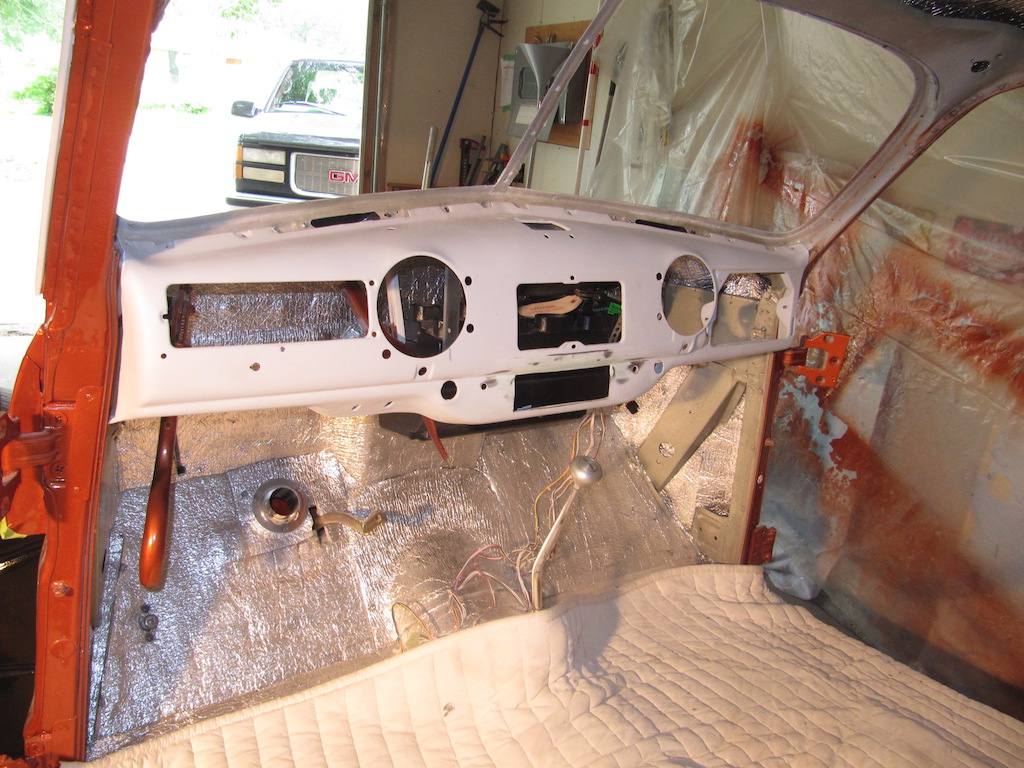
This picture shows evaporator behind the dash.
The Dryer
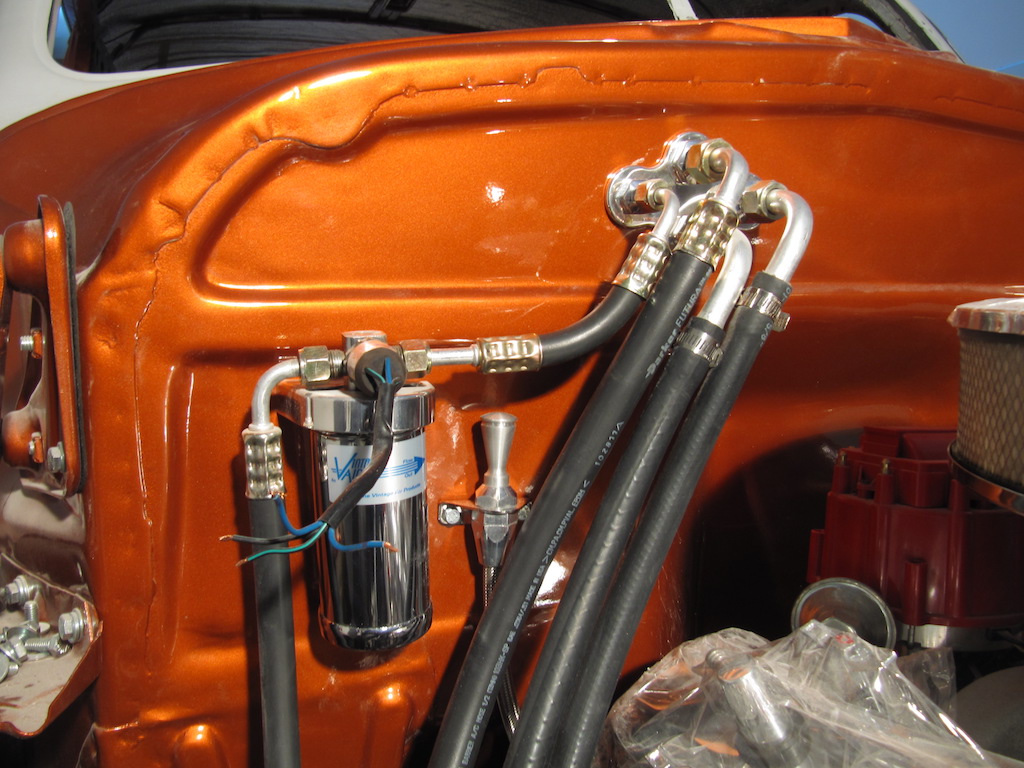
I upgraded to a chrome drier and chrome bracket when I purchased the AC system. The picture below shows the location of the drier on the firewall. The trinary switch is sitting atop the drier. I installed a stainless steel transmission dip stick between the drier and the hoses as shown in the picture.
The Electric Fan
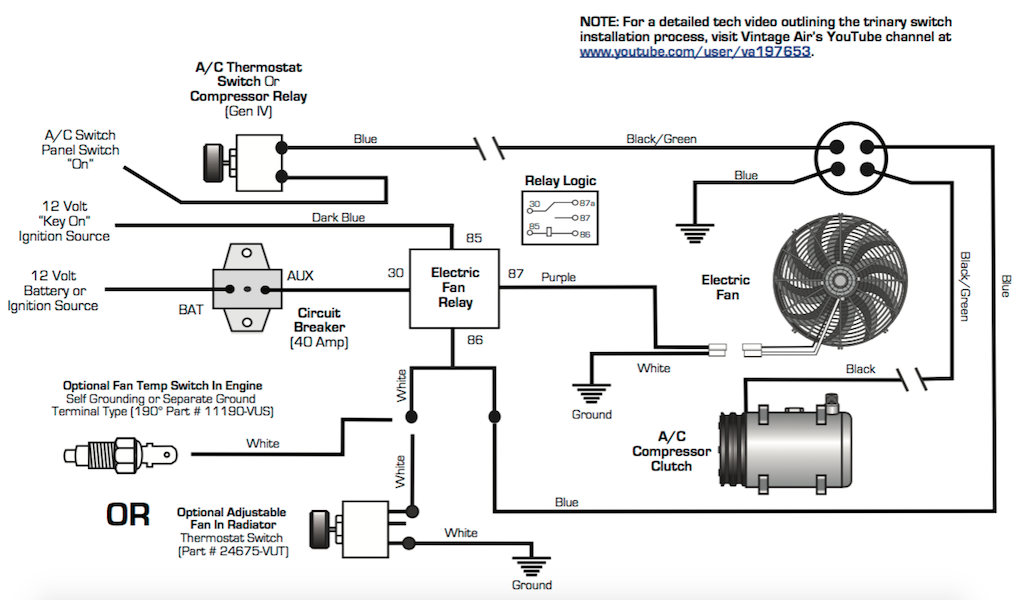
The picture below shows the wiring diagram for the trinary switch and the electric fan. The electric fan turns on either by the temperature sensor in the block, manual switch in the car, or A/C thermostat switch.
I purchased a Zirgo 3630 CFM 16 inch 12V electric fan from KMS Car Parts. It has a thin 4 inch deep design and can be either a push type or pull type fan. I did not have any clearance to install it behind the radiator (between rad and motor) so I had to install it in front (in front of the condenser). I was unable to take the blade off to reverse it so I had to send it back and get a new one. I asked them to reverse the blade before they sent it and that one worked fine.
The Condenser
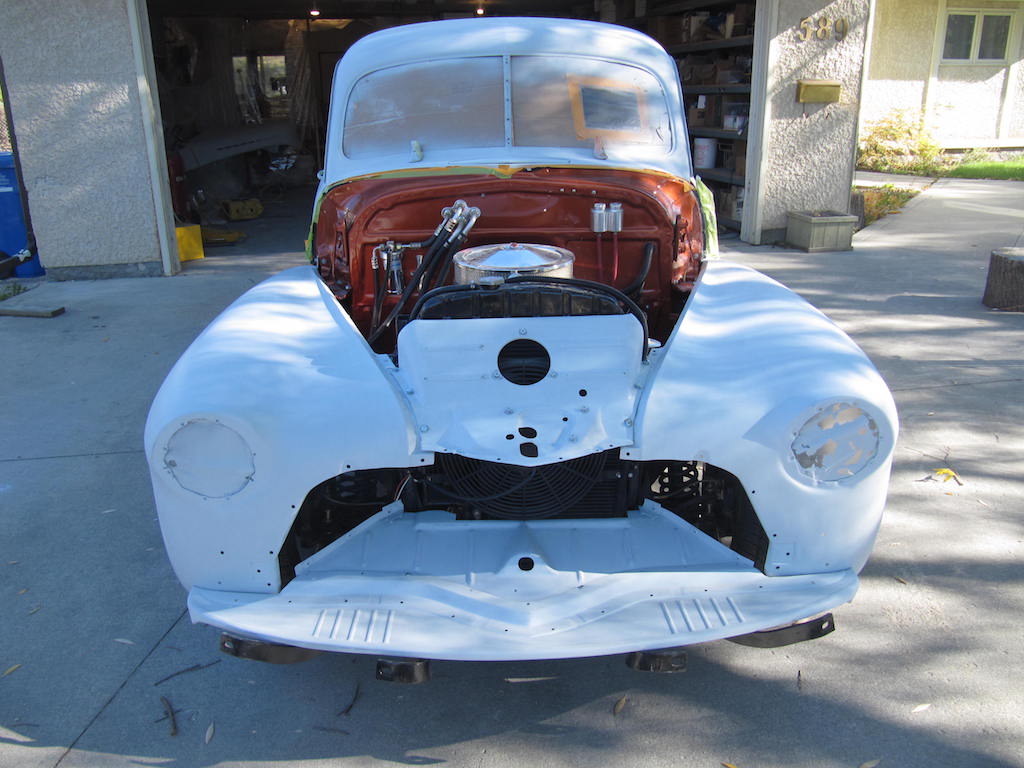
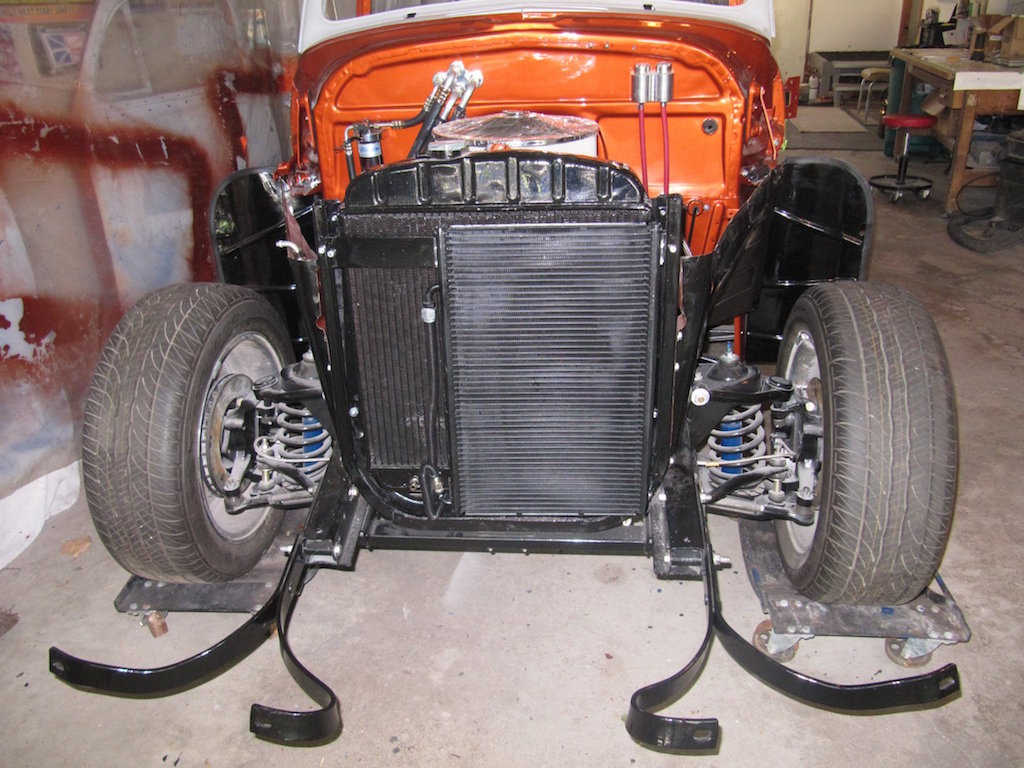
The picture below shows front of the car with the condenser installed. The stainless steel tubing has been covered with wire loom cover. The wheeled dollies that the car is sitting on were very handy for moving the car around in my garage. At this time, the motor was not running!
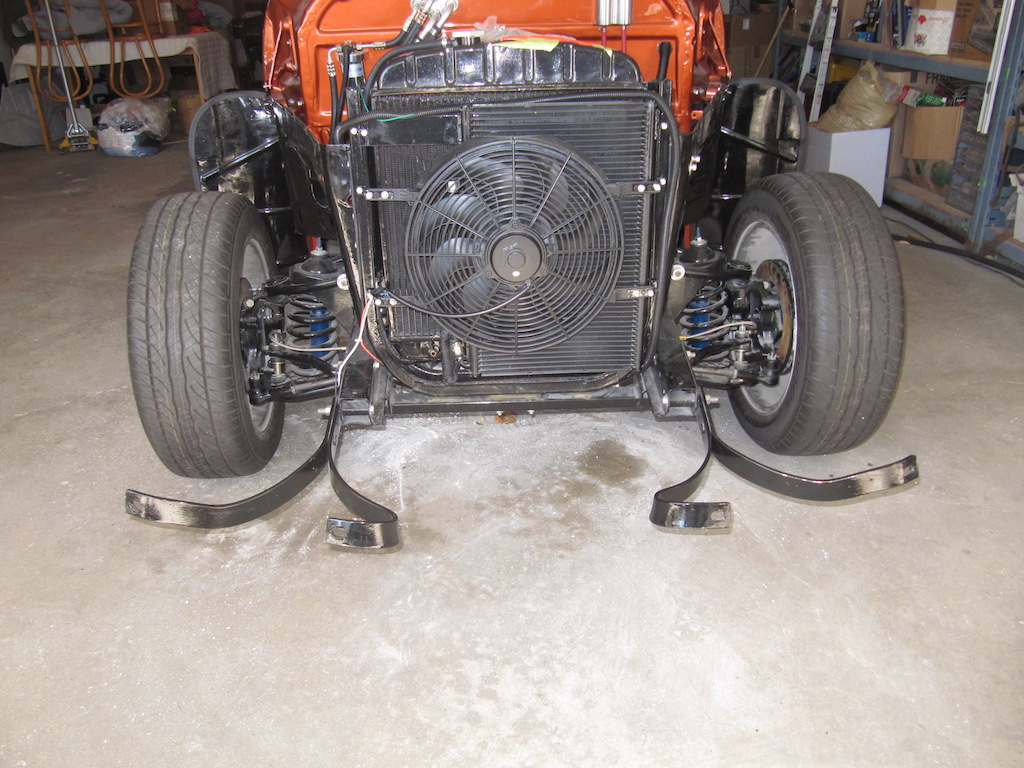
The picture below shows front of the car with the fan installed over the condenser.
Transmission Cooler
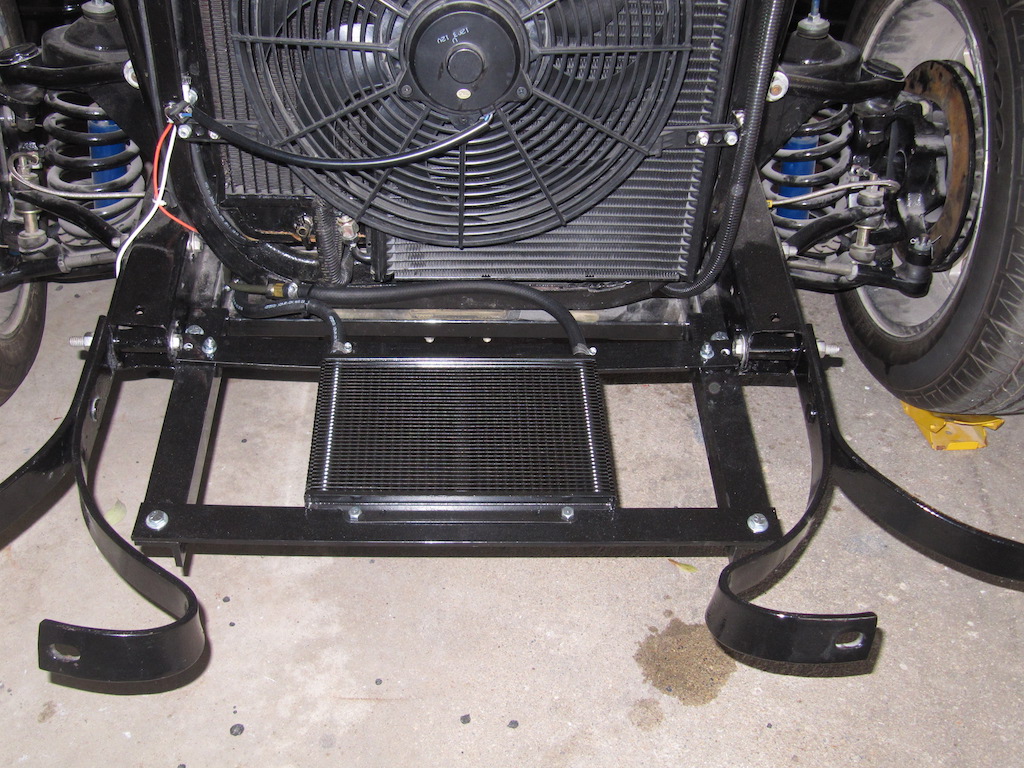
I purchased a transmission cooler from Lakes Transmission in Lakewood, Wisconsin for $65 USD (2013 price). I then had to find a suitable location for it. After checking some local streetrods, I installed it between my bumper braces as shown below.
I used 2 poly armour 5-16 lines 60" length to connect from the transmission to front flex hose. They came with connectors already on them. I only had to bend the lines slightly for a good fit!